

Kyosho ZX-5 Review, page 2/7
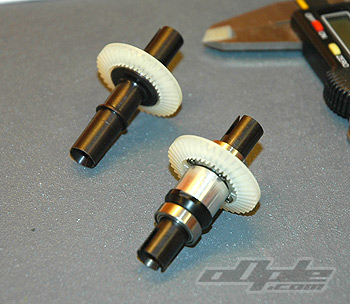
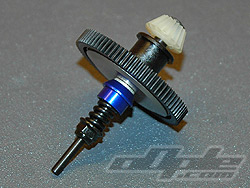
The first step in building the ZX-5 is to build the diffs, the rear diff is
pretty straight forward but the front is slightly more interesting since
you have 3 options to build, a Diff, One way or Spool (solid axle), this
is a pretty cool tuning aid for different tracks or driving styles. You
also have the option later on to use a centre one way. The Slipper / Spurgear assembly is next, its a double sided slipper so finer adjustment is possible, the slipper pads lock into notches on the spur, the adjusting nut is noticably easier to use than some cars. The slipper went together well and once laid in the chassis with the rear diff, was true and wobble-free. I de-greased the bearings as i went, by soaking in motor spray and using a light oil, this frees up the drivetrain somewhat, but it was noticable that the ZX-5 was quite free running to begin with, nothing seemed tight.
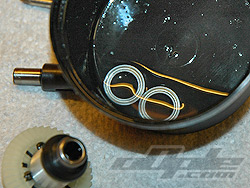
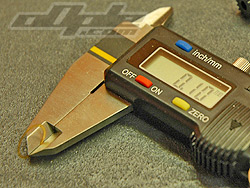
The rear gearbox went together very well, and was very free and silent, the front i had some problems with. The one-way diff is a plastic moulding and the toothed gear is screwed in place with 4 small screws, when placed in the gearbox there was a distinct if small "wobble". Deciding i must have overtightened the screws I took the gear off and re-did this step without clamping down the screws and the gear spun true, there was still a lot of noise when meshing with the front pinion so i took a thin 0.1mm spacer from the back of the one-way (see photo below) and added it to the front to space the gears slightly further apart, this seemed to cure the noise but the mesh was still good. |

|
 |
 |
all images, designs, texts and concepts copyright 2003-2005. All Rights Reserved. Jimmy Storey. rc(at)oople(dot)com.