Kyosho ZX-5 Review, page 3/7

Previous Page - Next Page

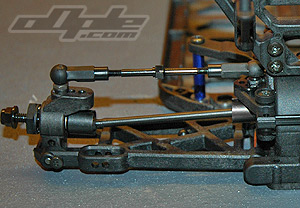
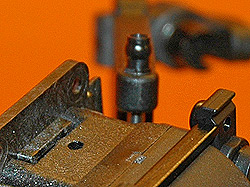
Rear suspension, this consists of some long lower arms with captured hingepins, the inner hingepins rest on plastic balls at each end so the angle of toe and squat can be adjusted with the various supplied pivot blocks. 

  The suspension seemed to fall into place without any binding, it felt like it had been run for a few meetings already but there was no slop.

After assembling the rear suspension the next step in the manual are the shock absorbers, these look quite complex at first, with a top and bottom cap, even the top cap is in 2 peices.

The first step is to assemble the seals into the screw-in  blue anodised cartridge, again this looked quite complex but was actually very easy, easier than say the Associated shocks where you always risk damaging the seals when inserting.

Filling and bleeding the shocks was an easy task, after putting on the top cap, the shock is upturned and filled from below, the bottom assembly has a bleed hole which is open when the cartridge is unscrewed slightly, so
pushing the shaft all the way in and tightening makes a perfect shock every time, nice.

Shock parts

I kept to the kit supplied shock oil which appears to be 35wt all round, with a new car like this i figured its best to start off with the kit setup and try and dial it from there though i am certain it will need some changes for UK tracks.

The shocks rest on alloy balls at both ends which should last a bit longer than the usual plastic efforts before becoming sloppy.


Previous Page - Next Page

all images, designs, texts and concepts copyright 2003-2005. All Rights Reserved. Jimmy Storey. rc(at)oople(dot)com.