|
||

|
|
||||||||||||||||||
|
#1
 15-12-2013
|
||||
|
||||
|
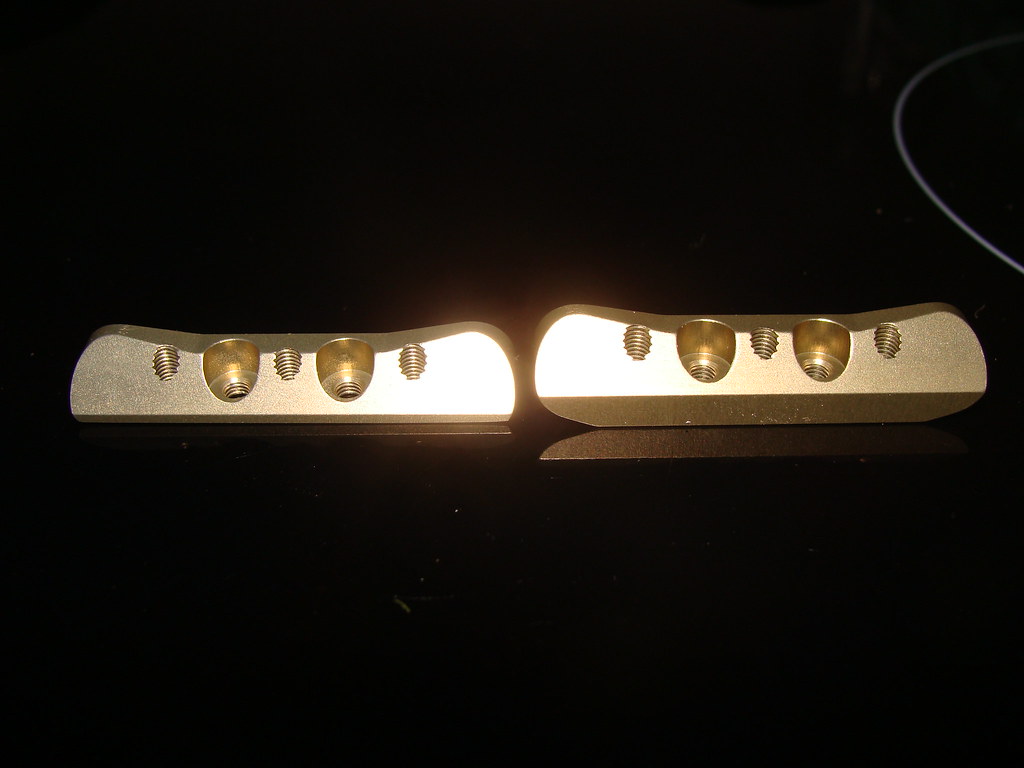
Due to today's fantastic weather, and the fact that last week at TORCH I found it hard to drive the DEX210 in the wet I decided to do a little surgery. First I dremelled (I don't know any machinists so I had to mark it out carefully and finish it off with a file/wet and dry) 2mm off the bottom of the rear toe plate to make it sit lower on the chassis and add anti-squat which should give more rear grip under power and more off-power rotation. Check out the before and after pics, you can really see the difference in the hinge pin angle:
   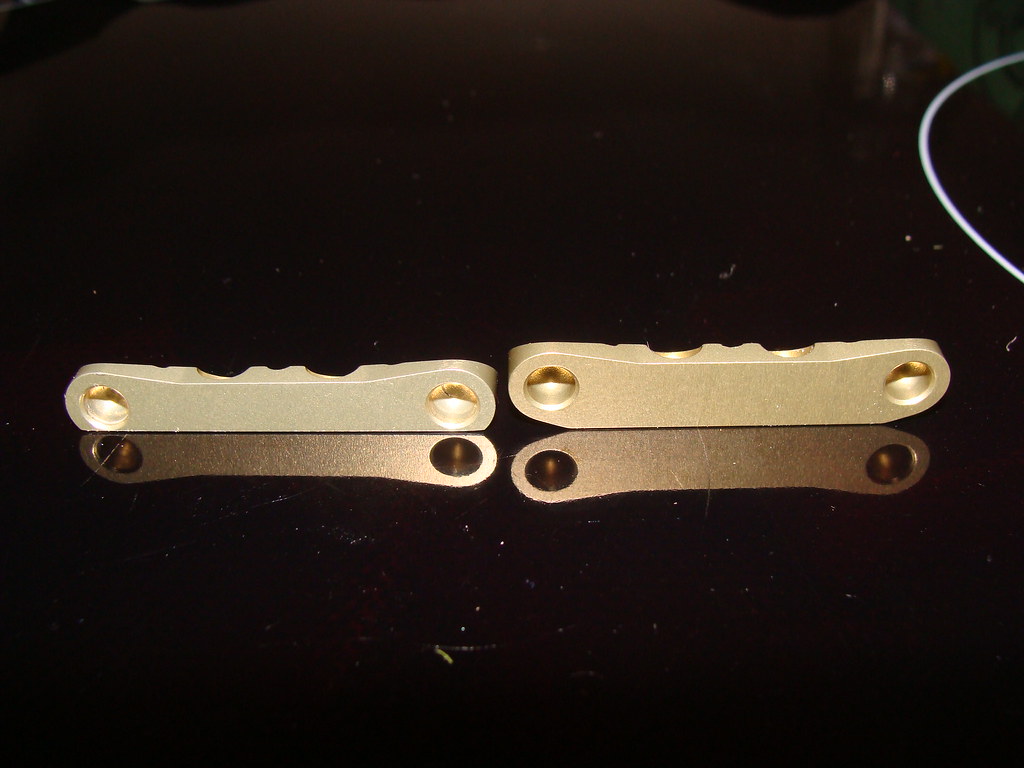 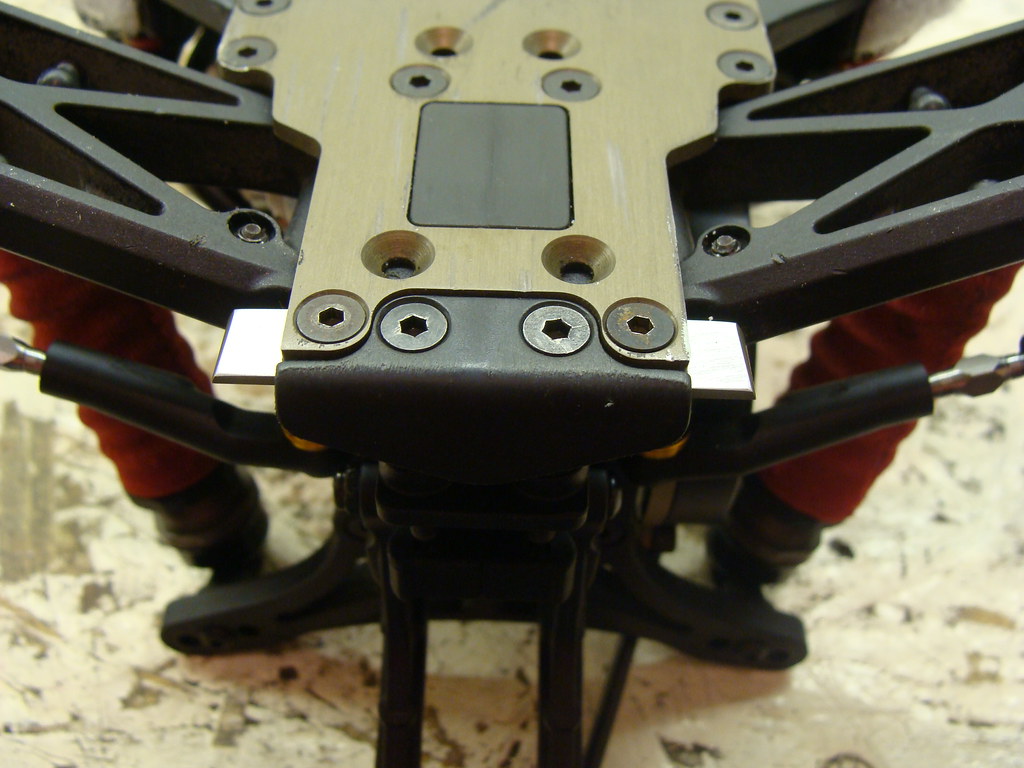 Also last week I was advised that as the grip comes up on astro you should make the wheelbase longer and longer (you can achieve this by flipping the arms over) but I didn't want the shocks to be on the rear of the car and vulnerable so I duplicated the 3 shock mounting holes on the other side of the arms: 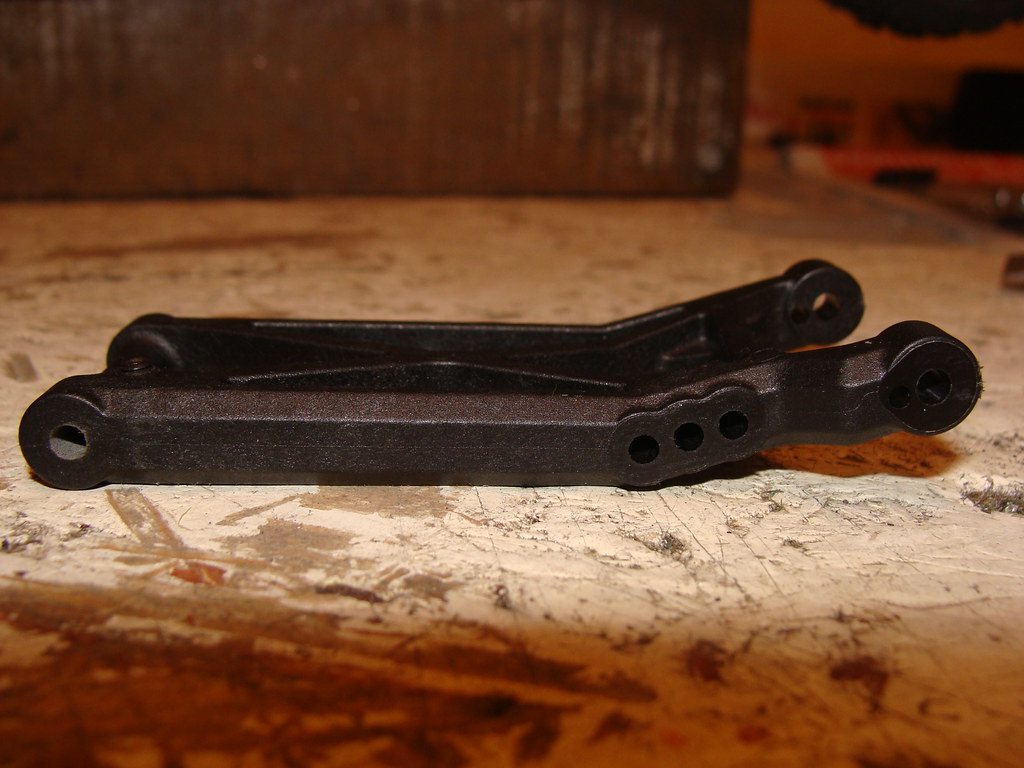 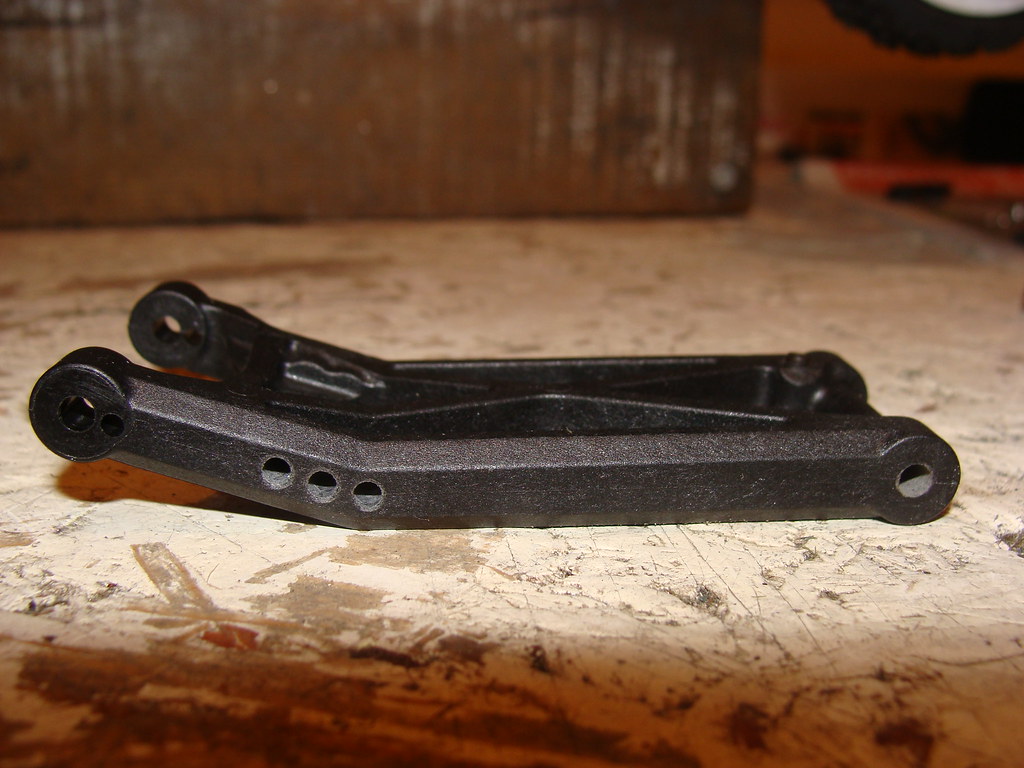 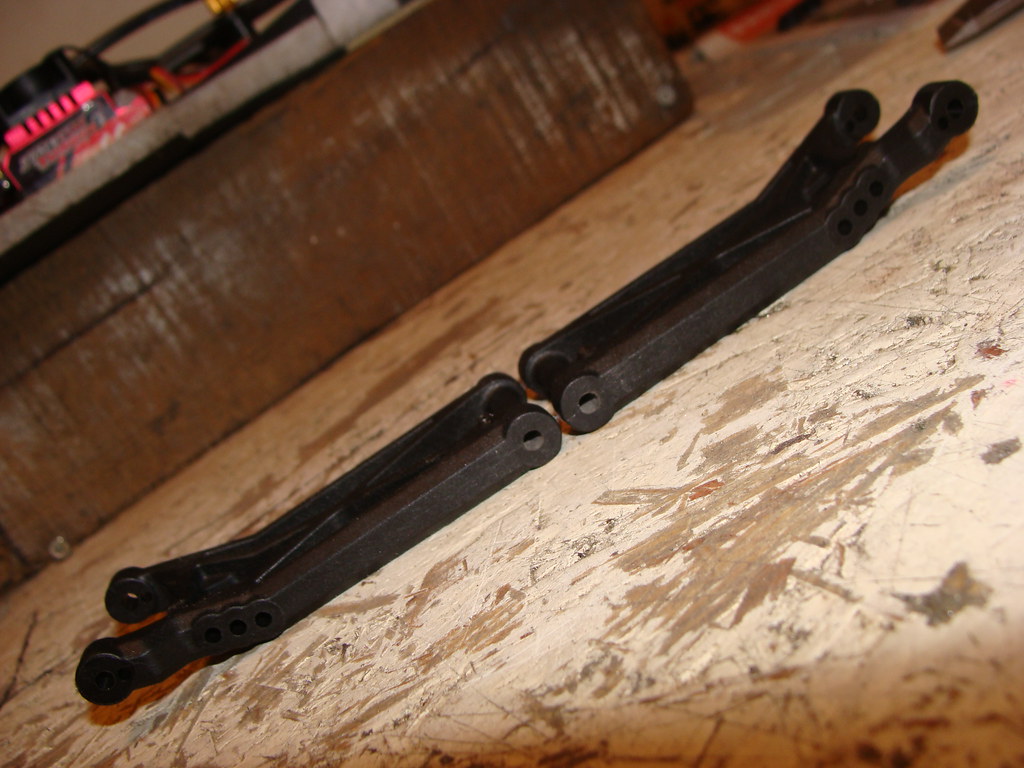 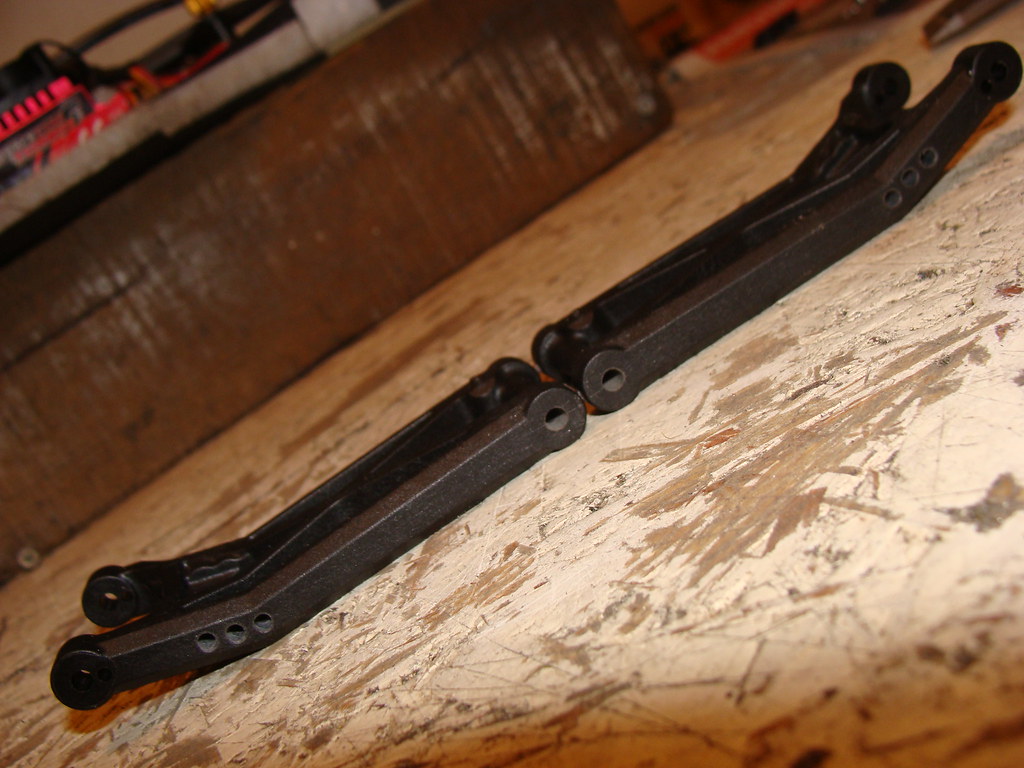 For anyone else who wants to do this the innermost shock mounting hole is 49.5mm from the inboard hinge pin and the other 2 are spaced at 4mm intervals from each other. I used an automatic centre punch to get them as accurate as I could. I'm not the 1st person to do this (I got the idea from someone selling a 210 on here) but I thought i'd post up the details for the benefit of others who might want to do the same. It should make the rear of the car more tuneable (it can be returned to stock by putting 2mm spacers under the toe plate) but i'd welcome any comments from those who are more experienced in 2WD than me. Look forward to testing it next Sunday... 
|
|
#2
16-12-2013
|
||||
|
||||
|
You have put the wrong url between img tags.
you need to use these : http://farm6.staticflickr.com/5495/1...e5d239de_o.jpg Last edited by Paultje040; 19-12-2013 at 06:32 PM. Reason: Removed image
|
|
#3
17-12-2013
|
||||
|
||||
|
Quote:
|
|
#4
18-12-2013
|
||||
|
||||
|
in Flickr go to the photo ->download/all sizes (right side off the screen)
in the new window, rightmouse click the image and open it in a new tab. in the adressbar you will find the url you need for the image tags
|
|
#5
19-12-2013
|
||||
|
||||
|
Quote:

|
|
#6
19-12-2013
|
|||
|
|||
|
FYI:
http://www.team-durango.com/part-inf...artNo=TD330599 Although designed for the type B chassis will fit the standard aluminium chassis... Fab
|
|
#7
19-12-2013
|
||||
|
||||
|
Quote:
 If you have a contact who can machine it off, that's off course even better - at most it'll cost you some money for stamps to post it to have it machined! And if you need to raise it again, spacers work fine and are not ergonomically awkward as long as you run mid-motor.
|
|
#9
19-12-2013
|
||||
|
||||
|
What about the RF hanger? The 3 degree antisquat RF hanger is 2mm taller than the 0 degree. So with this mod would you have 3 degrees antisquat minimum (using the 0 degree RF hanger). I presume most people usually run less (I normally about 2 degrees).
|
|
#10
19-12-2013
|
||||
|
||||
|
Quote:
There you go. You could also machine a plastic or alu one lower, but many alu ones don't have a lot of flesh around the outside mounts/screw holes, and the plastic one is not ideal to take material off of. Also worth noting, the RDRP LRC kit only lowers the rear, the RF hanger is the same as the 0 degrees anti-squat one!
|
|
#11
19-12-2013
|
||||
|
||||
|
Quote:
It's probably running about 5 or 6 degrees now in total, i'm not really sure how it could be accurately measured.
|
 |
|
|


 Team Durango


 Linear Mode

