Previous - 1 - 2 - 3 - 4 - 5 - 6 - 7 - 8 - 9 - 10 - 11 - Next

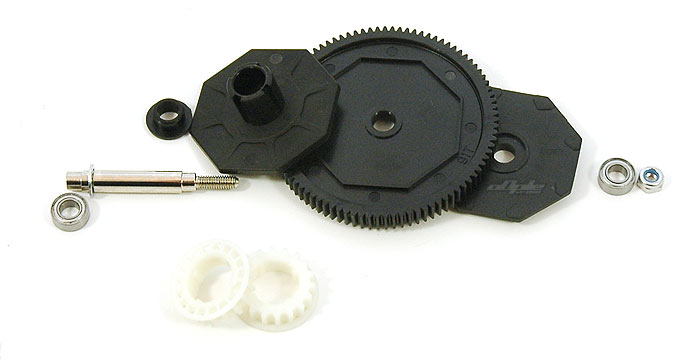
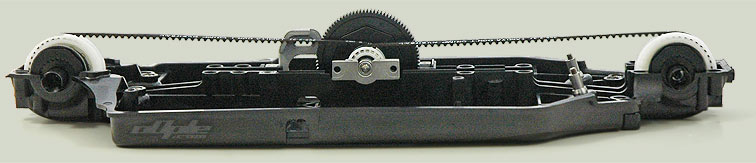
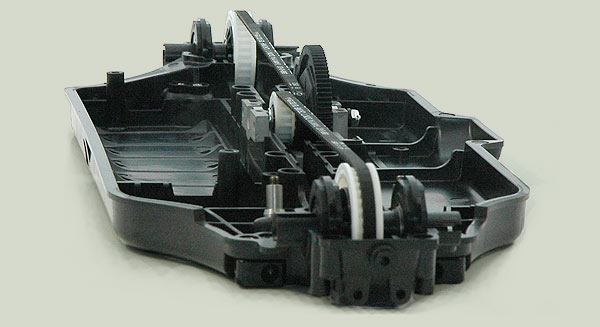
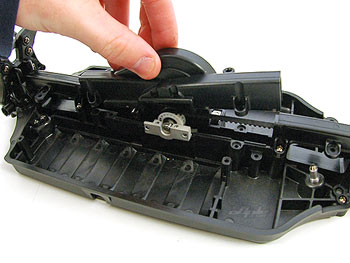
Before the front differential and gearbox top can be installed - the centre layshaft needs building, since there isn't enough 'give' in the belts to allow the installation these parts one at a time.

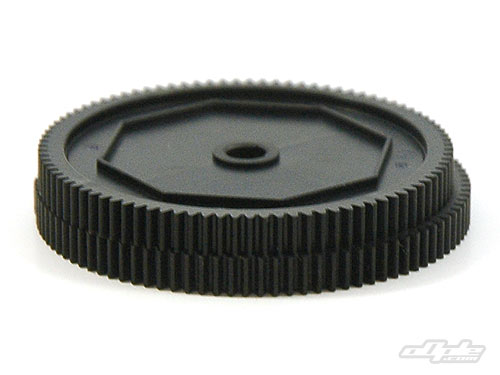
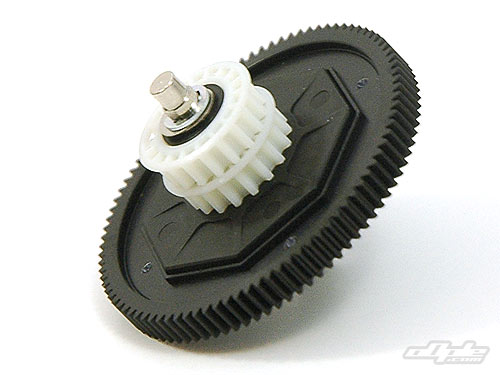
The lay shaft and spur gear assembly is fairly complex considering there is no slipper included. Indeed it actually looks like a slipper when assembled.    Even with the larger belts and pulleys from the 501X Worlds Edition – which are included in the Durga, there is still a concern over running this car with anything approaching a ‘hot’ motor, without a slipper installed.   The slipper would absorb shocks from running the car and landing from jumps - extending the life of the parts.

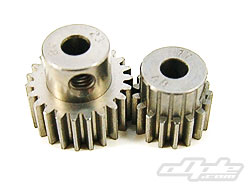
The kit spur gear is 91T in true 48dp, and shares the same design as the 96T included with the 501X, so it can be used with a slipper later on if you choose to upgrade the car.

The centre pulleys are the same 18T items used on the latest 501X Worlds Edition and should cope well with strain. No belt rollers are supplied with the Durga - these help to stop the belt skipping in extreme cases, and are available as an option part.

Given the construction of the the centre lay shaft, it seems like it would be a small leap for Tamiya to have included a basic slipper. You can't have everything for this sort of money however so Tamiya released a slipper as an option part at the same time as the Durga - I wasn't able to get this in time for the build.

With the same pulleys & equal-length front&rear belts as Tamiyas top-line racer, the TRF 501X worlds - The Durga has a great base to start from. Things aren't entirely the same as the 501X however. The motor sits further back, behind the spur gear to compensate for the main battery being further forward.
The front & rear belts have swapped sides when compared to the 501X, so now the front belt sits on the right of the car and the rear resides on the left. The only drawback to this design is the fact that the front one-way diff released for the 501X won't work in the Durga - a new DB01-Specific one-way is on the way however.

Before the main belt cover can be attached, the motor needs installing.  Tamiya often helpfully suggest installing electrics early in the build when it’s not really necessary – but here it is, since you can’t access the motor screws or set the gear mesh, once the cover is installed.
Tamiya supply 17t and 23t pinions

Since I’ll be racing without a slipper I decided to steer clear of brushless for now and chose to use a new 14x2 Peak Vantage that I had in my pit box - this should also be a good test of the sort of mild modified power that many Durga owners will want. 

Tamiya supply a list of ratios for the DB01 as a guide, along with two pinions in the kit, 17t and 23t. Tamiya suggest the 17t for the included Mabuchi rs540, and the 23t for the optional 'Tamiya Dirt-Tuned motor'. I chose to use a 21t pinion on the Peak 14x2.

The lower motor screw is hard to reach so Tamiya supply a long 2.5mm allen key for this purpose. The allen key pokes through a hole in the chassis side, and a corresponding hole in the centre belt tunnel to match up to the motor screw.

The main belt cover attaches with 8 screws.  Four small 2.6x8mm screws clamp the centre of the cover onto the motor mount – which holds the lay shaft assembly firmly in place.

Previous - 1 - 2 - 3 - 4 - 5 - 6 - 7 - 8 - 9 - 10 - 11 - Next