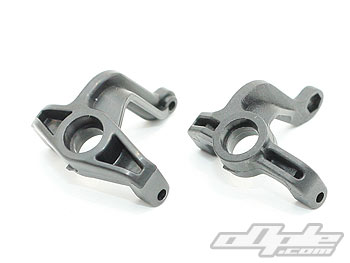
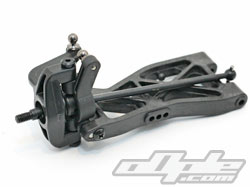
The front hubs are really very similar to the Losi XX4 items (also seen on the JConcepts BJ4x4 car and others) – indeed apart from the shiney finish they look near identical. The front hubs along with all the suspension parts are however subtly altered from their ancestors. Metric bearings, metric hinge pins and various design choices have seen to that.
Tamiya have seen what works and jumped right in to compete, rather than work things out for themselves over the course of a few seasons.
The hub carriers are similar to those on the Losi car but these have horizontal ball studs rather than vertical.
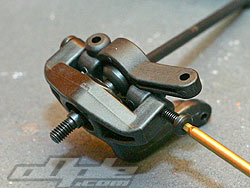
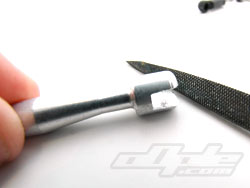
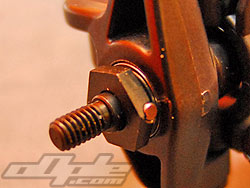
Threaded king pins insert into the hubs and spin on the hub carriers – maybe the holes here are slightly off-centre or simply not deep enough – but there is some significant friction to the steering when both kingpins are inserted. This seems a shame when you consider the excellent and smooth steering rack.
Tamiya item on the left has slightly more bracing
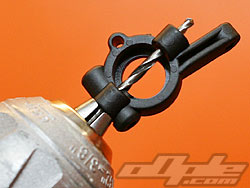
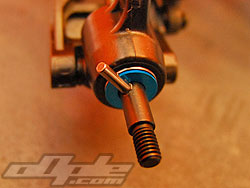
After a few attempts to free up these hubs I gave up any hope of an "easy option" to this friction and ran a 2.5mm drill bit through the hub carriers from one hole across to the opposing one. This helped a lot - and things were at least acceptable.
I would guess this could be a dodgy batch - but if not, then break out the drill! Over time, things will improve by just running the car so even though the parts were not totally free after drilling, it was no real concern any longer.
drilling straight through both holes
Assembled hub / hub carrier and axle
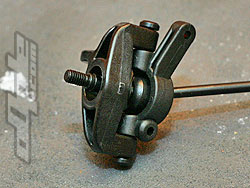
All hinge pins are captured on the 501X
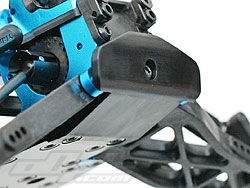
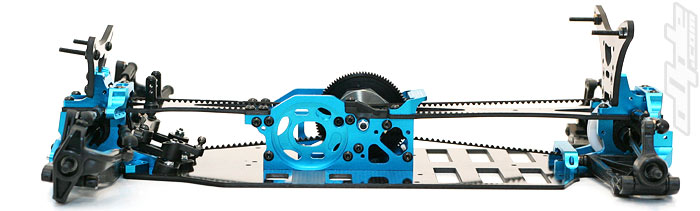
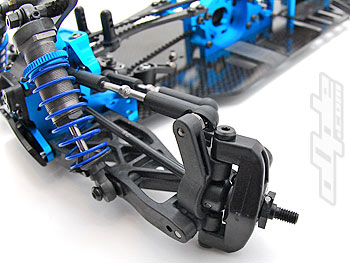
With all the parts assembled onto the front suspension arms - they can be installed just like at the rear. Only the rear of the front suspension hinge pins spins inside the steel ball fitting - the front of these hinge pins goes through a simple alloy brace which is then secured to the front bulkhead / gearbox
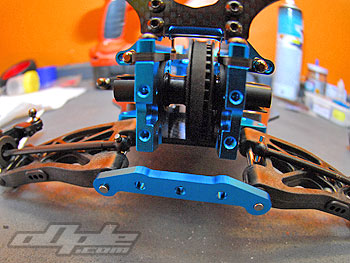
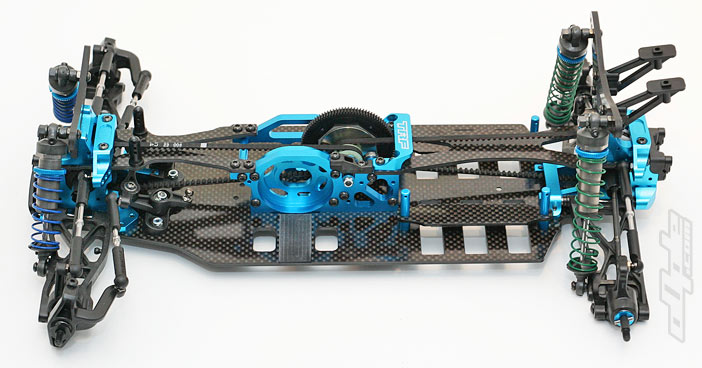
With most of the car now built, its obvious that the front and rear differentials are very exposed, from all angles. Where the similar Yokomo BX was let down a little, was in the cheap polycarbonate dust shields to cover front and rear diffs.
The 501X uses moulded plastic covers which give a much better impression and should be a lot tougher.These come in two parts for both front and rear ends of the car. A bottom cover which covers the over hang from the carbon fibre chassis and an end cover which is the same profile as the differential.
The front bottom cover also acts as the front bumper, whilst the rear lower cover has a gap at the rear so dirt can exit.
Both end covers attach with two screws and require anti-roll bar mounts attaching with a further two screws. There are no anti-roll bars included in the kit nor have I seen any for sale separately, but there is no harm being prepared.
Front diff cover - a nice tight fit
Front lower diff cover / bumper
Rear lower diff cover
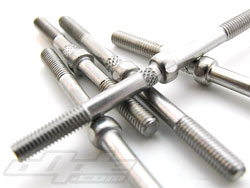
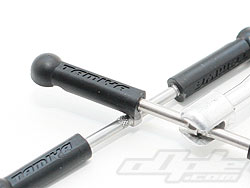
Steel turnbuckles are provided in the kit and aren’t the fanciest looking things it has to be said - they are better than most steel items. A small hex and rounded corners make using the correct tool vital. The kit doesn’t come with a turnbuckle tool and I couldn’t find one to fit. In the end I used a Lunsford punisher tool and used a small file to take a small amount of material off each face inside the tool until it fit the 501X turnbuckles like a glove – a snug one.
The turnbuckles thread into some rather nice Tamiya emblazoned rod ends. These need holding firmly to insert the turnbuckles and again there is no tool provided to hold these. So I used the tool provided with the RC10B4, which just slips over the rod end and stops it from spinning. It’s preferable to chewing the rod ends up in a pair of pliers.
Filing the Lunsford tool to fit
Assembling
Tamiya logo on the rod ends
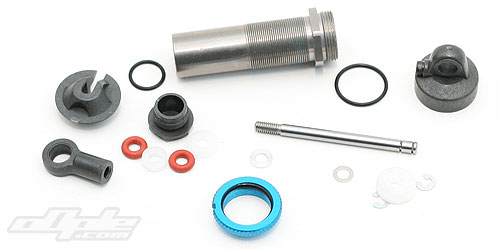
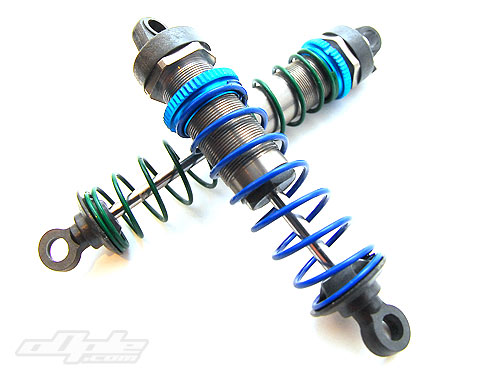
Tamiya must already have a wide range of quality shock absorbers which could have been included in this car. But instead they decided to create some of the nicest and well thought out units around - showing their commitment to producing a no-compromises racer.
Early prototypes, and even the main promotional photographs until recently, featured Associated shocks and springs - and the 501X shocks can be thought of as an updated and upgraded version of those from Associated.
Drilling the top caps to use bleed screw
Bleeding the shocks
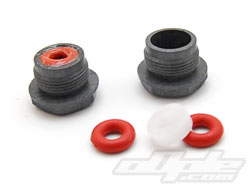
Cartriges house the seals neatly
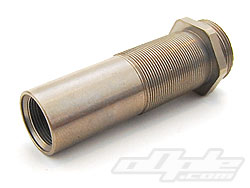
The shock bodies are threaded and are a similar colour to those on the Associated cars but that’s where the similarities end. Plastic cartridges hold the seals and are inserted from below, but unlike most, these require no clips since the simple act of screwing the cartridge into the body holds the various seals and spacers in place.
The shocks come with three different Teflon pistons. Similar to those from Associated (but slightly smaller diameter), these all feature two holes and only the diameters of these holes change. The pistons are not numbered when removed from the parts tree but aren’t too hard to tell apart.
The medium sized piston is used on both ends in the manual. I decided to go my own route here and use a setting similar to that of my BJ4 worlds edition – a car with a similar weight distribution.
I used the piston with the smallest holes on the front with 35wt AE oil, and the largest holes on the rear with 30wt AE oil.
Tamiya include some shock oil in the kit but it is of unknown weight or quality - so I used Team Associated oils.
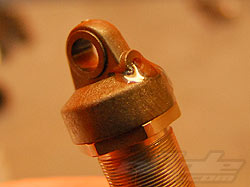
The top caps are plastic and additionally sealed with an o-ring around the top of the bodies. The top caps have bleed screw holes but these are not mentioned in the manual and are not “active” without some preparatory work with a drill.
To “activate” the bleed screws, a small hole needs to be drilled in the top of the caps from below, to connect up to the horizontal hole already moulded into the caps. This is a very quick and easy step. Small 2mm hex head screws then do the job of sealing the top caps and enable you to remove all the excess air and oil and make a perfect shock every time.
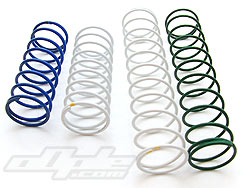
White springs are included in the kit, and much like the rest of the heritige of this car - the springs are virtually identical sizes to those from Team Associated. I decided to again opt for my own springs here and swapped the white springs for AE blue front and green rear. The blue front springs are harder than the white - but not much. While the green springs feel fairly similar.
The 501X, like most Japanese and American cars, is built for racing on dirt tracks – of which we have very little in the UK. Consequently the setup is probably going to require some work before the car can fully realise its potential. The initial impression of the suspension and general layout does seem to point toward the 501X being similar to the JConcepts BJ4x4 (it has the same suspension, or close), so I set the shocks up in a similar manner to those on my JConcepts car.
The shocks feel very nice when built and feel 'right'. They are easier to work on than those from AE.
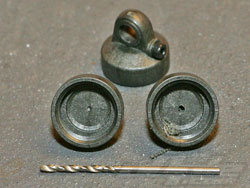
Wheel fitment on the 501X is the near-standard LOSI fitment. With a small XX4 style hex on the front and simple axle pin at the rear. This will please many, and like the Yokomo BX, is a real boost to the cars usability and practiality. The list of compatible cars / wheels is long. The rear drive pin is especially susceptible to falling out since all the pins are fairly loose in the axles. A dab of grease on the pins keeps them more or less in place and extra pins are included, for when you lose one.
Front uses small XX4 hex
Rear drive is from a pin, like LOSI / AE
Wheels are very slightly copied.
Tamiya didn't try to reinvent the wheel here (pun! lol) - seriously! The wheels on the 501X are almost identical to Losi XX4 front, and Proline B4 rear wheels, and would be hard to tell apart but for the Tamiya logo stamped in. This gives racers a head start if they already run cars with this fitment.