 |
 |
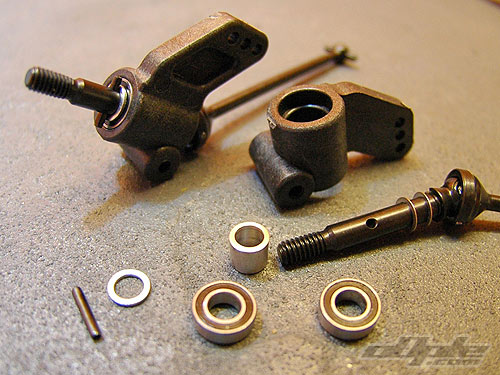
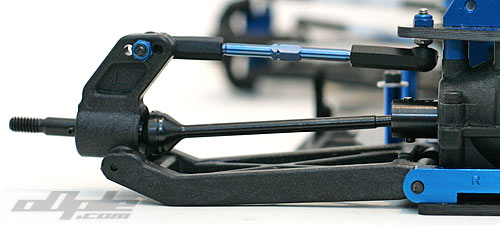
The rear suspension is borrowed for the most part, from the RC10B4 2wd buggy. The suspension arms are, however, machined by JConcepts to clear the TC3 gearbox and a small hole is added to the arm for the mounting of an optional anti roll bar kit.
The inner hinge pin is fed at a pre set toe & squat angle through the front and rear alloy braces. |
These braces work together so the pin will follow the line through both without friction. To change toe or anti squat you need to change both braces. You can achieve a limited change of anti squat by loosening off both blocks and placing a washer under one of the blocks to change anti squat, before tightening them down again, although this isn’t really recommended.All the hinge pins come with a slightly tacky greasy film on them, I cleaned them up with motor spray before installing them - just makes it easier.
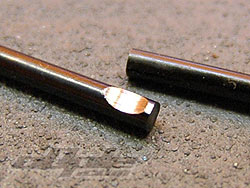
The rear hinge pins are held in place with a grub screw on the front brace. But just like the previous BJ4 incarnation, these can back out over the course of a few races. You can solve this by putting a flat near the end of the pins so the grub screw will just sit inside this and the pins won't be able to move. |
 |
 |
I found it hard to hold the hinge pins while using a small flat file, so I opted for a dremel with a sanding drum. I made a simple indentation at the end, which should better prevent the pins backing out.
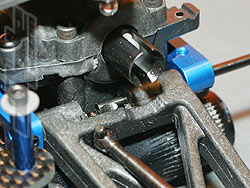
The rear shock tower attaches to the alloy tower mount with 4 screws. The screws are low down so assembly isn’t the easiest. I was advised by a fellow racer to assemble the shock tower / mount earlier in the build (Before attaching to the rear top deck). |
|
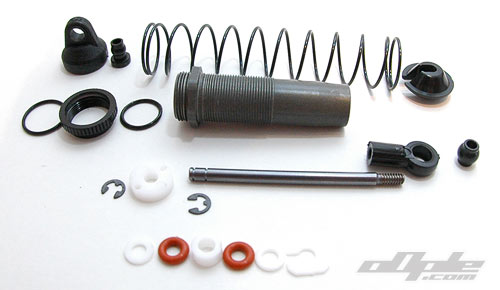
The shock absorbers on the BJ4x4 are the well established Associated shocks, identical to those on the Factory Team B4. These consist of threaded alloy bodies which are Teflon-coated for reduced friction. "Unobtanium" shafts are included, these have a long lasting finish, superior to the standard polished items.
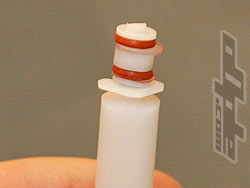
The shock seals and spacers, along with a plastic clip, are placed on a plastic tool called the “shocky tool”. This is pushed carefully into the body of the shock, and with a little bit of careful manipulation of the tool, the whole lot should snap into place. This is a delicate operation as seals can be damaged at this point, so Jconcepts advise to add 3-4 drops of the included 30wt shock oil to ease home the assembly.
To change seals later on is an even harder job, you have to push the shocky tool into the body from below and try to catch the edge of the plastic clip thus dislodging it.
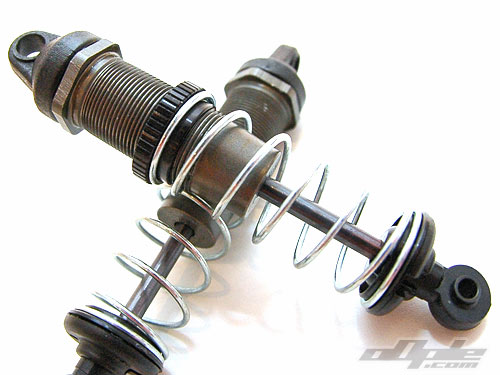
The shocks are some of the best around performance-wise, but in my opinion are some of the hardest to work on and maintain.
|
| Silver front springs and Black rear are included in the kit, along with some 30wt silicone shock oil. This setup is likely to be too soft for most UK tracks. The setup I will be running uses Blue front and Green rear springs. |
 |
Wheels are included in the kit - but no tyres or foam inserts. This is becoming a more common feature of competition-specific cars like the BJ4x4. Tyres, and to a lesser extent foams, are very track specific and add to the cost so it's a good move - though it might not please some.
The rear wheels are Proline B4 wheels, and the fronts Losi XX4/XXX4 wheels. These are a standard among a few manufacturers now with the likes of Losi, Jconcepts, XFactory, Yokomo, Associated and others using these fittings. The major benefit for a lot of racers is the compatibility with the (rear) wheels of their 2WD buggies.
I used Schumacher yellow mini spike tyres on the car for the test race. |
|
