Installing electrics in the Keen Hawk isn’t overly easy, depending on what electics you'll be installing. The chassis is narrow and space in all areas is fairly tight. The servo as you may have noticed stands upright, inline with the battery tunnel – a long link transmits the movement all the way up front to the bell crank poking up through the chassis.
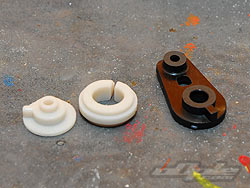
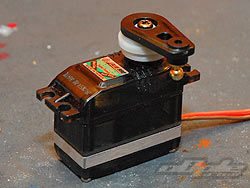
Mounts for installing the servo are moulded into the chassis and an all-plastic servo horn with in-built saver is provided to protect things. The saver feels fairly stiff which is good, but could be stiffer and won’t really suffice on high traction surfaces under racing conditions, so a heavy duty version would be a good investment or even a solid servo horn if you have a strong metal-geared servo.
I used a BLUEBIRD 616 servo in the Keen Hawk build. This is one of their newer servos and features metal gears and good speed / torgue. The main thing is that this servo is solid - there is no centering problems or similar that the old Bluebird servos suffered from. The included servo saver has different adaptors to suit most fitments, I used the Futaba style as this is what Bluebird use. The servo saver isn't bad despite its totally plastic construction, and has coped very well with the rigors of racing.
I didn’t install the motor early in the build phase as suggested in the manual - I wanted to keep my options open as to what I was going to use. The motor space is tight – I mean really tight. The chassis and gearbox completely surround the motor area and as a consequence there is only a limited range of movement back and forth to mesh the pinion / spur.
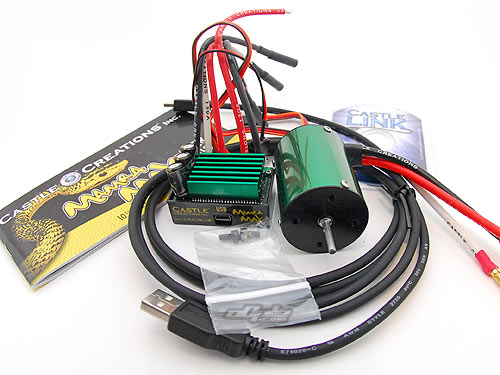
I decided on running the Castle Creations brushless system, the Mamba Max. The Mamba Max 5700kv motor initially presented some problems in the Keen Hawk – it simply wouldn’t fit!
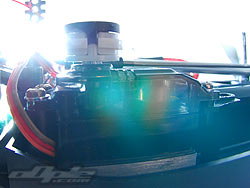
There are tiny screws around the diameter of the Mamba Max motor cans and these were fouling on the chassis and / or gearbox. Now, the talk is that you can actually grind the heads down if needed - and thats what I thought I'd have to do, but just before I gave up, I tried turning the motor 180 degrees and have the motor wires exit at the rear (facing away from the ESC) before looping back round to reach the ESC.
This did the trick and I was able to screw the motor in place and move it all the way back in the mount to mesh my 18t pinion with the 85t spur.
The difficulty I experienced is part of the design of this car and not the particular motor I was using. To get more clearance around the motor people commonly dremel away at some of the strengthening ribs inside the motor bay. This area is strong so a little trimming shouldn’t hurt things but I didn’t want to do this if I didn’t have to, at least not straight away - and I did find I was able to get a good range of adjustment without any modifications to anything.
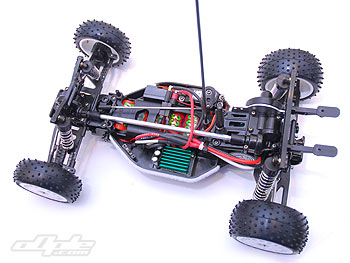
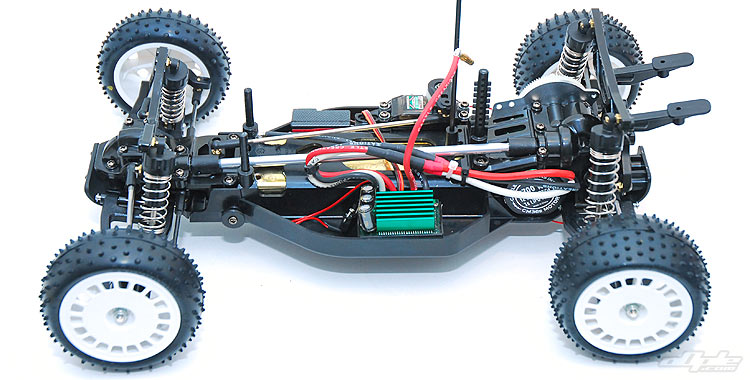
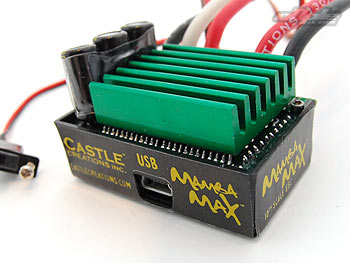
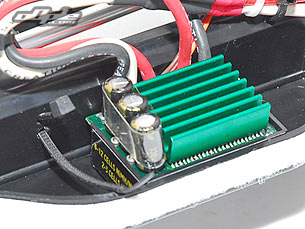
With the motor fitted I turned my attention to the large Mamba Max ESC – this thing is big – as are most current brushless controllers. Some require Fans, making them very high which might not suit the low-slung Keen Hawk shell. The Mamba Max needs no fans so what it loses in height is makes up for in the large foot print – still, large or not the Mamba Max was a made-to-measure fit in the Keen Hawk chassis, perfect.
I secured the `Max with Velcro so it could easily be lifted up to gain access to the USB port (for setting profiles – very ‘cool’) The large Mamba Max ESC meant there wasn’t much room for a receiver on the left hand side – I managed to fit my small KO 301 receiver at an angle but the wiring was a mess and it wasn’t the prettiest install ever. I ended up installing the receiver in front of the servo on the right hand side – and running the aerial wire back to the built-in aerial mount.
We'll have a more thorough test and write up on the Mamba Max soon on oOple.
The servo mount can be shaved down to move the receiver further back here - something I did later on.
The mamba max controller is a nice snug fit - I drilled 2 holes in the chassis to loop a zip-tie through to hold the wires in place.
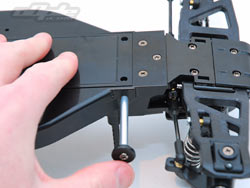
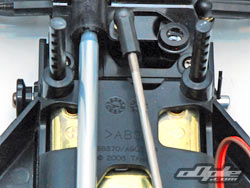
The battery in the Keen Hawk sits lengthways along the centre line of the chassis, in front of the motor. Because of the centre drive shaft hovering above and various electrics crammed in along either side – there was simply no other way than to drop the battery in from below, and so that’s that Tamiya did. A long plastic battery tray clips in place and is secured with an aluminium rod which is in turn secured with a body clip.
It’s a neat idea and works well for the type of battery that most owners of this buggy will use – the ubiquitous 7.2 Volt ‘Stick Pack’.
The process of installing the battery couldn't be much simpler. Inserted from below and the retaining tray is clipped in place.
Despite the obvious pretensions at being a race-capable buggy, the Keen Hawk isn’t very easy to use with race-level batteries in a side-by-side soldered configuration.
Because the battery is inserted from below, the chassis is formed around and above the battery area – meaning that access to the connectors is fairly poor. This is fine for Tamiya style connectors or similar – but for Corally (bullet) or direct soldering, access, especially at the rear, is limited. But anything is possible, and the chassis has enough options that you can use just about anything with the aid of a dremel!
I test fitted a couple of my corally equipped race packs and the front connector had room to poke through the battery tray, whilst the rear connector was completely covered and also meant the battery tray door wouldn’t close.
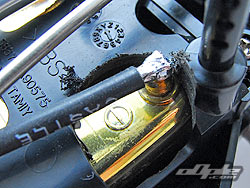
I could have taken some material off the top rear of the battery area, but instead I chose to fit DEANS style connectors which I was then able to poke up through one of the many holes in the battery compartment. Care needs to be taken to keep wires away from the shaft.
Trakpower holes slightly obscured
Fixed!
I also test fitted the TrakPower 4900 LiPo pack - see the review seperately on this website. The Trakpower was the easiest option by a long way for me, the fit was good and the connector holes ALMOST lined up perfectly.
Unfortunately I still needed to enlarge the holes at the front of the battery area slightly to get good access to the corally style connectors.
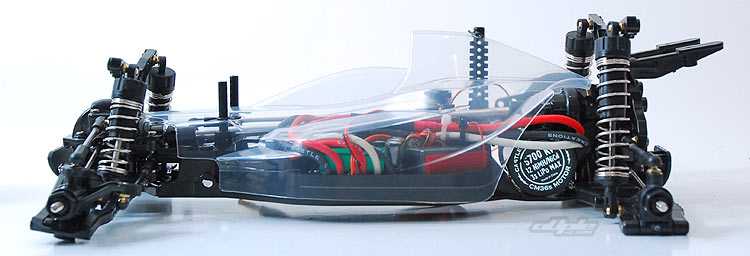
Overall, because of the low shell, narrow chassis, centre drive shaft and long steering link - there is a lot to think about when installing electrics in the KeenHawk. So, it does take a little longer to make sure everything is neat and tidy, so it will fit under the low-slung body shell:
The shell sits very low on the chassis, lower than the Dark Impact - So keep it neat!


 I decided on running the Castle Creations brushless system, the Mamba Max. The Mamba Max 5700kv motor initially presented some problems in the Keen Hawk – it simply wouldn’t fit!
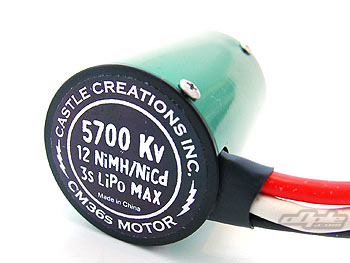
 The large Mamba Max ESC meant there wasn’t much room for a receiver on the left hand side – I managed to fit my small KO 301 receiver at an angle but the wiring was a mess and it wasn’t the prettiest install ever. I ended up installing the receiver in front of the servo on the right hand side – and running the aerial wire back to the built-in aerial mount.
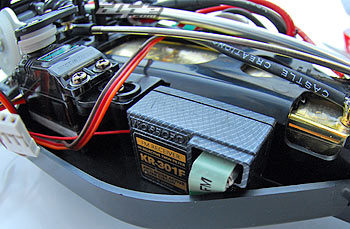


 the holes at the front of the battery area slightly to get good access to the corally style connectors.