Onto the actual Building part!
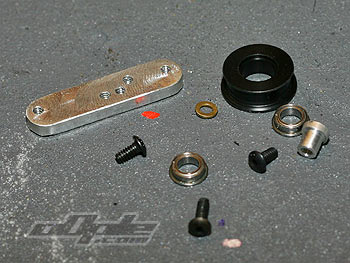
Bag A is first up and contains just the belt tensioner. This consists of a straight chunky alloy adjustment bar and a dual ball race supported toothless idler pulley.
The alloy bar is a machined then drilled and threaded for the screws. It looks to be well made and accurate but the finish isn't anthing amazing to look at, no big deal as it will be hidden from view in use.
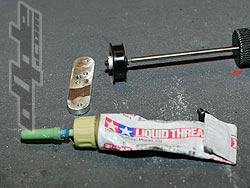
The idler pulley is assembled and screwed into a hole on the adjustment bar, there is no mention of thread lock but I used some just to make sure.

The pulley has one side-wall bigger than the other, there is no mention in the manual which way this should face and the photos are not very clear so I installed the pulley with the large side facing in toward the alloy bar.
|
|
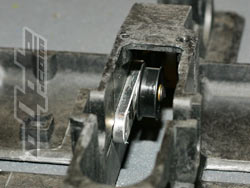
| The assembled tensioner is mounted using 2 screws in corresponding slots in the main belt tunnel of the chassis. I noticed once installed that the tensioner would not adjust correctly / smoothly, there was a small amount of flashing in the slots which prevented full and free movement of the tensioner so it’s wise to run a scalpel lightly around these slots just to clean them up, no real material needs removing just cleaning. |
|
|
|
Tensioner pulley attaches to the mount |
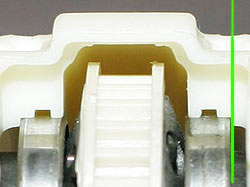
Cleaning the holes so the tensioner slides |
Tensioner inside the chassis |
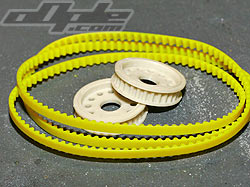
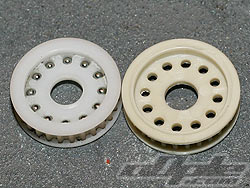
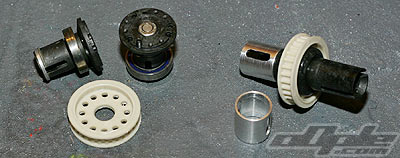
Differentials are up next; these are basically the entire unit from the XX4 with the pulley changed for the larger X-5 unit. The pulleys are unique to the X-5 and look good, there was a small amount of flashing which was removed in a few seconds.
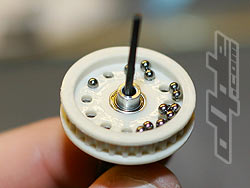
The pulleys diff ball holes appear to be just straight through holes with no cage-like effect, so the balls can very easily fall out when assembling, it certainly helps to use the thickest diff grease you have lying around (none is supplied). Unfortunately with my AE grease it took about 4 trys before I managed to get the first diff together without spilling the balls all over the desk. Thicker grease would have helped control the balls (!). |
|
|
|
X5 Pulleys and Long xxxs belt. |
XX4 Diff Pulley left and X5 right. |
The balls dont stay in easily. |
|
From the original XX4 I had the option of running a steel diff in the rear and a plastic composite one up front in the X-5. The difference with the X-5 being the lack of a centre one way or clicker as in the XX4, so you are stuck with permanent 4wd, personally I like some one way effect.
I sourced a front One-Way from the XXXs touring car, the one way was from John Price’s XXX4G+, another single belt car with fixed drive.
I decided to run the One-way up front and the plastic diff in the rear with “Chris Long” Alloy out drive savers. (see end of review for details) |
 |
|
Fitting a LOSI One Way, the manual directs you to the “tuning section” at the rear. The tuning section mentions that the team X-5 drivers all use this one way
Fitting the front diff is simple, but for the one-way a little work is needed with sandpaper and a dremel or similar.
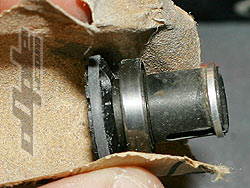
First up the one way halves will not fit in the diff pulley, one of mine did fit fine, but the side with the welded flange would not. So one of the halves needs to be sanded where it sits inside the pulley gear. I did this by wrapping the half in sand paper and turning it, using the one-way bearing as a ratchet and just spinning it either way for a while until the half would sit inside the pulley without much pressure. (All the work to fit the LOSI one way can be avoided by using the new Lesro / Xfactory one way designed for the X5 !) |
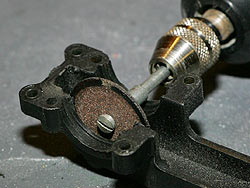
Next up were the front belt cover and bulkhead, these both need widening inside very slightly, this is tricky without the dremel tool shown in the manual. The manual shows to use a cut-off disc presses sideways against the inner walls of the bulkead and belt cover to remove a small amount of material and give a little more room for the one way which is very slightly wider than the diff. |
|
|
|
Taking material off the one way half. |
Taking a little material off the belt cover |
Edges (line) shown pinch the bearings |
If you like your car with fixed 4wd then its obviously a lot simpler to fit but I like a one-way of some sort, the mods to fit the one way and have it run freely are probably the most time consuming part of the build. More information about the one way is later in the review. |
|