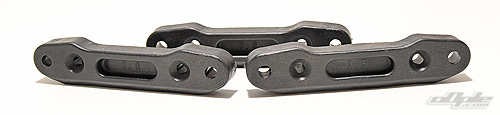
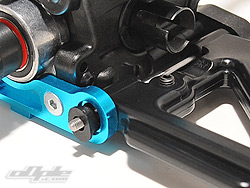
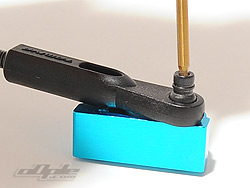
Above: Three rear pivot blocks are provided to adjust toe-in angles
The front and rear ends of the car are assembled as units before being attached to the main chassis. The rear end is first so we'll start with that.
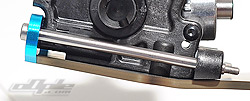
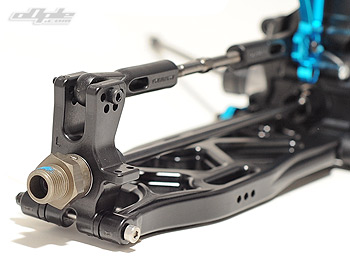
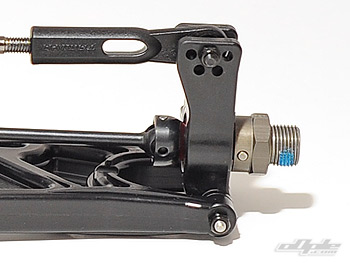
The front and rear suspension blocks attach directly on to the rear gearbox - the front being machined alloy with inserts to guide the suspension shaft height, giving a range of anti-squat possibilities. The rear suspension block is on a plastic parts tree (plastic isn't a great word - this is high quality plastic as you'd expect however) and there's actually three of them; 2, 2.5 and 3 degree toe-in. The manual suggest using the 2.5 degree toe-in block so that's what I went for, but it should be fairly easy to change later on depending on track conditions.
It's worthy of a note here that the manual really doesn't guide any setup choices - or even mention them. The different tuning options are assumed to be known by the user - and for an experienced racer, even one from another class of vehicle, it's no big problem. For new racers however it would have been a good idea to go into more depth.
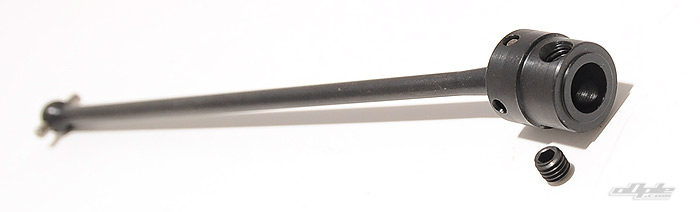
All the drive shafts on the 801XT are CVD-style and come pre-assembled, but as with any car it's a good idea to take these apart to make sure they're done properly - especially on such a high powered vehicle. The manual doesn't show the build of the CVD's but they are just like a scaled-up version of the TRF 501X shafts - or indeed a vast number of other Tamiya & other manufacturers CVD-style shafts. The grub screw that held the pin in the CVD was very tight but didn't appear to have any threadlock - nor did there seem to be much in the way of lubrication on the joints other than a trace of thin oil.
Above, centre shaft
I rebuilt all the shafts with the supplied threadlock-jellyjuice and some Tamiya Anti-Wear grease I already had in my tool box. The type of lubrication is personal choice and some people swear by using none at all, but I've used the anti-wear grease for a good while and been happy with it. The CVD's might be OK pre-built from the kit - but there's no doubting they will be better once properly rebuilt.
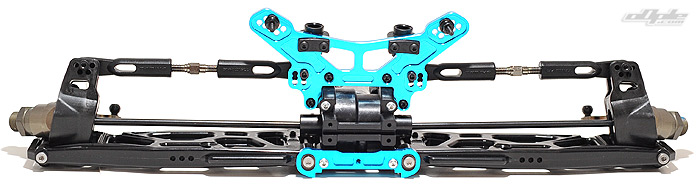
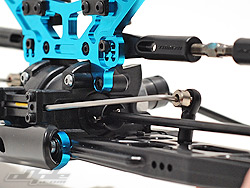
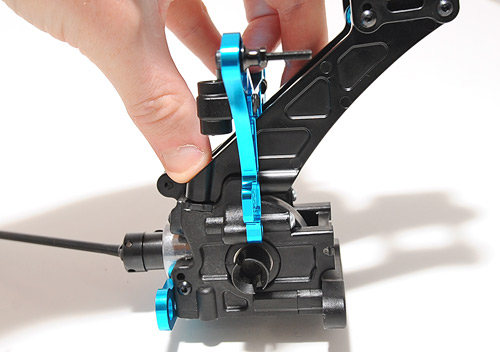
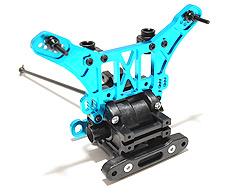
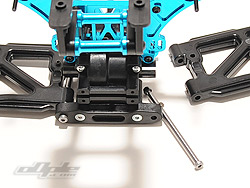
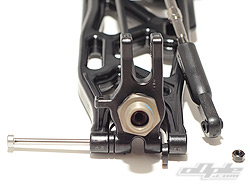
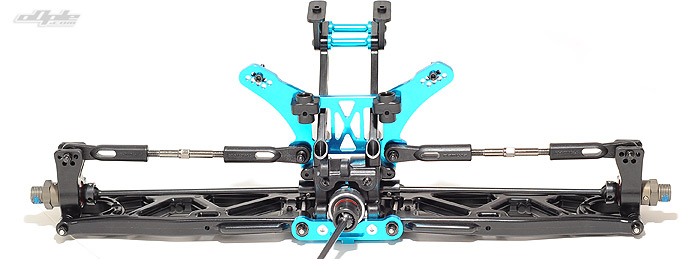
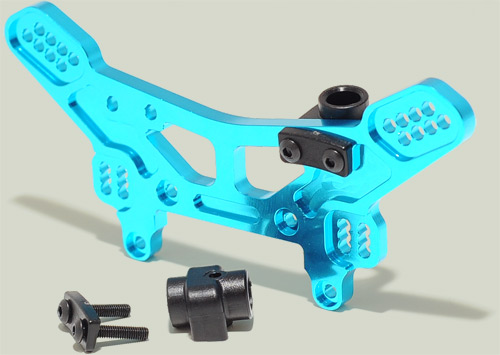
The rear shock tower attaches to the gearbox 'frame' at the same time as the wing mount - the two somewhat interlocking to form a stable base for the tower. The tower itself provides plenty of tuning options for shock positions and camber link settings as you'd expect from a race car. The wing mount is also adjustable for height and pitch but to a lesser degree.
The suspension on the 801XT uses what can only be described as huge-huge suspension arms - moulded in a softer plastic than most of the other parts so they can absorb heavy impacts, but make no mistake these are certainly not 'soft'. Heavy-weight hinge pins slide in from the rear to be secured by a small 3mm nut at the front brace - these certainly look up to the job of handling the punishment.
Rear suspension arms
The rear block controls toe angles by swapping out for alternate versions
The front alloy brace is used to set the anti-squat angle using the provided off-set inserts.
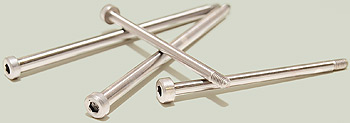
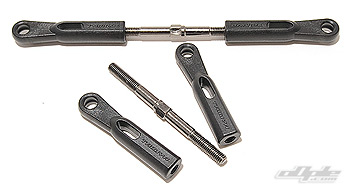
The upper links on the suspension all round the car are of course adjustable using huge and weighty steel turnbuckles - again, there's no fear of breaking one of these.
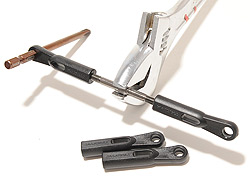
A little grease inside the rod ends helps assemble and later adjustmet a LOT
Not the prettiest way - and you might get laughed at track-side if you use this method
Inserting the steel balls using one of the engine mounts.
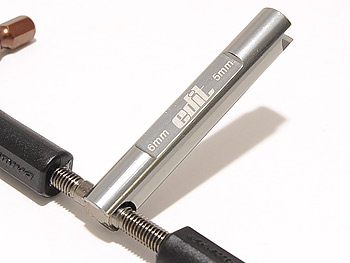
Tamiya don't supply a tool for assembling / adjusting these - I used an adjustable wrench to hold the turnbuckle and a drill bit through the hole of the plastic rod end to spin it round. This wasn't a pretty solution so I dug in my box to find my EDIT turnbuckle tool - the 6mm end fitting the Tamiya turnbuckles perfectly.
Steel balls need pushing into the plastic rod ends on the assembled camber links but I found this very had since I couldn't find any decent tools in my house! A good method I've used previously is to screw the balls down against the rods until they 'pop' into the socket (see photo further up). I used one of the engine mounts from later in the build to screw into - much better than trying to hammer them in with the back of a screw driver it has to be said.
Chunky hubs finish off the rear end for now. The bearings are a tight squeeze and need pushing in perfectly straight otherwise they'll get stuck half way in. Anodised alloy hex hubs slide over the exposed CVD axle and are pinned in place with a huge steel pin.
The pins are set back a little from the hex which is a shame - if they went through the hex itself then they'd be covered by the wheel and it would be impossible for them to fall out if / when something became loose. It's a small chance but the more things that are cleverly 'captured' in this way the better as far as I'm concerned. Still - build it right and you should be OK.
Effectively tightening the grub screw to capture this pin isn't easy and the best way is to use a wheel over the hex to hold it still whilst tightening. I didn't have any wheels at this point so I neglected this step and simply used my soft little fingers to tighten things up - paying the price later on when one pin fell out, of course.
press those bearings in square!
Fore / aft adjustment with spacers provides a small amount of wheelbase adjustment - about 4mm in total.
The front end builds up in a very similar way to the rear - using the same gearbox surrounds to hold the gear case. Similar plastic rear and alloy front hinge pin blocks are supplied and again three different plastic blocks are included to raise or lower the rear of the pins and when combined with the plastic inserts for the front brace the angle of the pins can be altered to change castor / kick up angles.
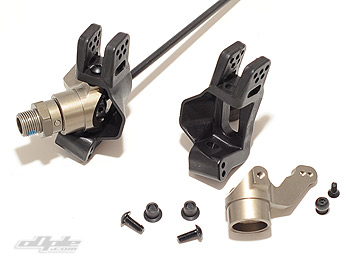
The 801XT uses a traditional C-Hub style setup on the front to provide steering. The hub carriers are chunky moulded plastic whilst the steering knuckles themselves are machined from alloy for extra strength.
Steel inserts push into the hub carriers and 4x10mm button head screws act as king pins to give the finished assembly a super smooth action. No grease is suggested here but I used a dab of anti-wear grease where the bushing meets the hub carrier.
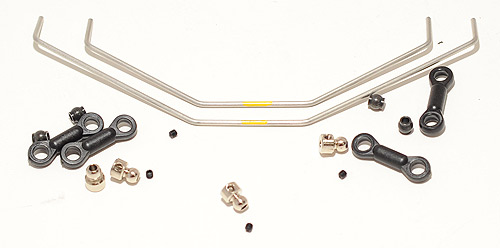
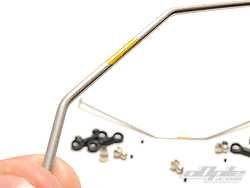
The 801XT comes with front and rear anti-roll / stabilizer bars which have a dab of yellow - indicating they are the 'medium' version. These look flat in the manual but are actually angled to lift up to clear the driveshafts - naturally I put these on wrongly at first.
Tamiya already have optional anti-roll bar packs for front and rear - which contain softer (red) and harder (blue) versions along with yellow. This colour coding runs through to the shock springs in the same way they do on other TRF cars.


 The suspension on the 801XT uses what can only be described as huge-huge suspension arms - moulded in a softer plastic than most of the other parts so they can absorb heavy impacts, but make no mistake these are certainly not 'soft'. Heavy-weight hinge pins slide in from the rear to be secured by a small 3mm nut at the front brace - these certainly look up to the job of handling the punishment.
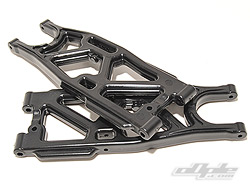


 The front end builds up in a very similar way to the rear - using the same gearbox surrounds to hold the gear case. Similar plastic rear and alloy front hinge pin blocks are supplied and again three different plastic blocks are included to raise or lower the rear of the pins and when combined with the plastic inserts for the front brace the angle of the pins can be altered to change castor / kick up angles.