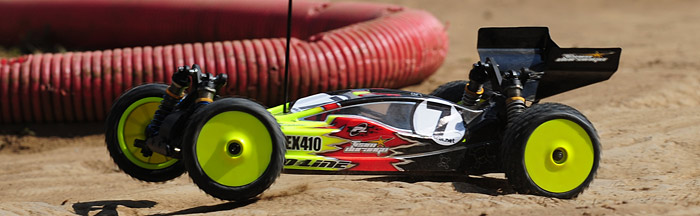
The DEX410R is the new cut-price way into 'Durango' ownership - coming a few months after the release of the original full-on competition slayer and 2009 IFMAR World Champion winning DEX410. This new 'R' version does away with some of the things you could possibly live without whilst keeping all the bits it needs to be a top-level racer, or at least that's the promise. We managed to sneak one of the first kits out of the factory to get an idea for the new budget racer.
The 'R' is essentially the same car as the original DEX410 but with less of the expensive alloy parts. Team Durango kept the alloy main chassis and vital parts such as the motor mount, but did away with the ultra expensive alloy side pods which as spare-part items came to a whopping £90ukp on their own should you somehow manage to damage them - replacing them with moulded plastic parts where appropriate.
Whilst the car is so similar to the original 410 it would be easy to overlook some of the neat new features and details on the 410R that we wanted to do a full review on the car - to see whether the new pretender can match up to the race pedigree of its big brother.
If you don't already know the history of the 'Durango' concept then have a look at the original DEX410 review we conducted on oOple in 2009 when that car was originally released. Gerd Strenge is the originator of the concept - an ultra narrow shaft driven hand-machined prototype that was only ever available to team drivers.
Michael Volmer is the brains behind the DEX410 production design - capturing most of the aspects that made the prototype cars winners on the race track, whilst improving the designs for ease of use and cost.
Martin Achter's 2009 Worlds winning DEX410
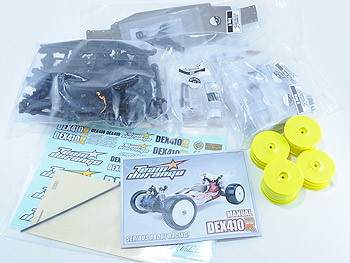
Kit contents
The lettered build stages
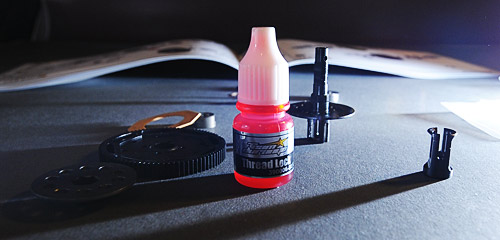
Aha! The threadlock in this kit didn't leak.
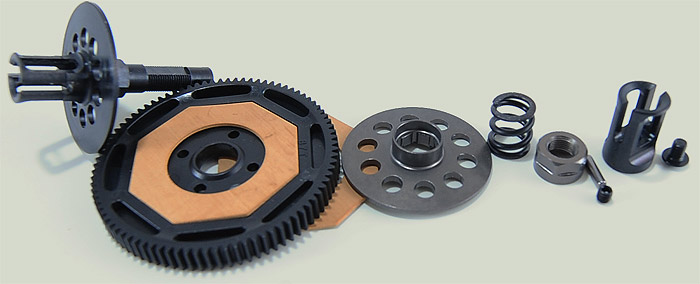
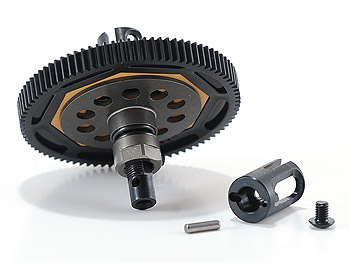
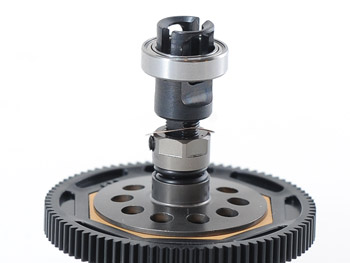
First up in the build manual is the centre slipper assembly and I begin to wonder what I'm doing taking photos of the parts since this looks exactly the same as the full 410 competition car we reviewed last year - all the same parts assemble in the same way. The pads are the ubiquitous 'B4' size octagonal shaped design and are clamped either side by intricately machined alloy plate and combined layshaft and plate machined from steel - all heavily lightened, if that's the right way of putting it.
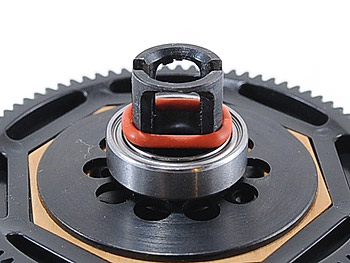
It's a good idea to degrease all the metal parts in this stage since the steel parts are particularly oily and in this high-stress area it will help keep things tight in combination with a liberal dab of the provided threadlock juice.
Assembling the unit throws up the only difference over the DEX410 that we can see - the pads are slightly smaller and make for an easier build as they simply drop in place into the provided 87 tooth spur gear. The spur design looks similar to others but the centre hole diameter is larger than those seen on the likes of the Associated B4 or Tamiya TRF511 and therefore not interchangeable.
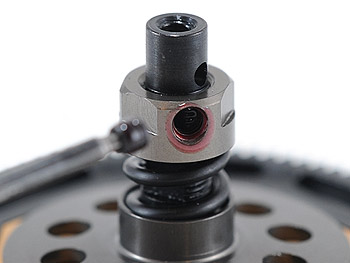
You don't want the slipper nut coming loose - threadlock the grub screw well.
oops! You need to put the bearing and washer on before the slipper nut and outdrive.
An old O-ring over the front-facing outdrive will keep the bearing from falling off when changing cells etc.


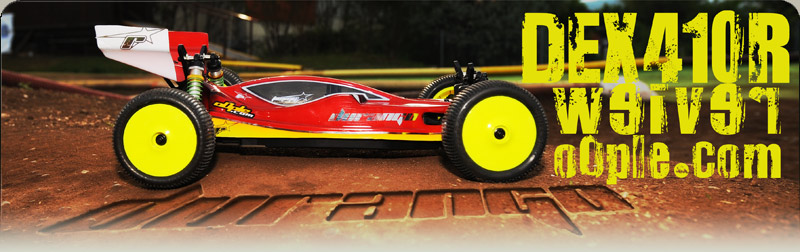
 The DEX410R is the new cut-price way into 'Durango' ownership - coming a few months after the release of the original full-on competition slayer and 2009 IFMAR World Champion winning DEX410. This new 'R' version does away with some of the things you could possibly live without whilst keeping all the bits it needs to be a top-level racer, or at least that's the promise. We managed to sneak one of the first kits out of the factory to get an idea for the new budget racer.