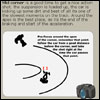
The disclaimer: The purpose of this little article is to show how I create some of the images I do. As I said in my other photography article - I don't really read photography books or study, and don't pretend to know it all or even half of the technical jargon. I am a complete amateur - a punk, and I wholly admit to that.
I was recently given a body shell to review - there is not much to review on a shell I hear you say, fair enough. But this shell is from a small company in Japan with plenty of interest for me to talk about, so I knew it would make for an interesting write up. To go along with the article I wanted a special photo of the body in question - the GOMURPH.
Taking photos of a clear R/C polycarbonate body shell is hard. I really struggle to get a shot that can capture the lines and look nice, without spending ages in photoshop hand-drawing the lines on. The clear plastic just doesn't pick up well enough and I haven't yet found the 'magic formula' for it.
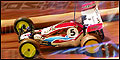
Here is an example of some 'enhanced' photos:
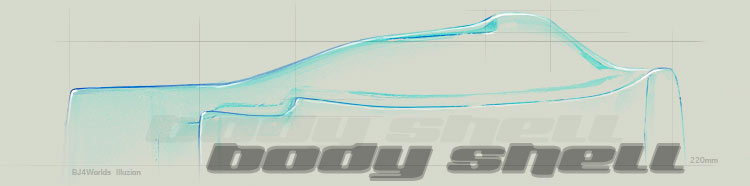 
Both the above images have extensive photoshop enhancement and hand-painting to accentuate the lines.
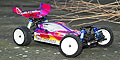
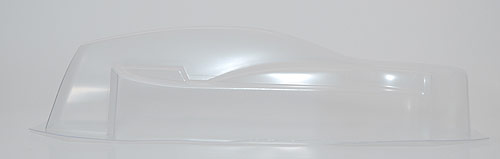
| I have painted on computers for many years - so I wanted to try and see if I could get the image I wanted with minimal photoshop painting - or even none at all. The standard photo straight from the camera was dull, uninspiring and just not 'oOple'. It would be relatively easy for me to enhance this, but as you can see - the hilites are all wrong and the shape is hard to make out. |
 |
If I want to make reviews for money - this is fine. If I want to make reviews for passion, this is simply not good enough.
I heard of a technique called light painting, where you paint the light areas into a long exposure with a torch or similar. This doesn't really work with a small R/C body shell, so I needed a smaller light. By 'painting' in the light that I wanted - I would be able to avoid lighting the areas I didn't want and only light the nice lines of the body shell. |
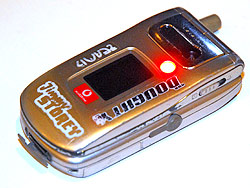 |
I left the body set up as you see above, on my white card. I then did a search of the house for a small coloured light that I could use to light the shell. It took me a while before I remembered an old mobile phone I had that could display various brightly coloured lights.
I left the phone charging and set up the rest of the shoot. I turned the lights off to cut out any external sources of light - so I would only have my phone adding light to the scene.
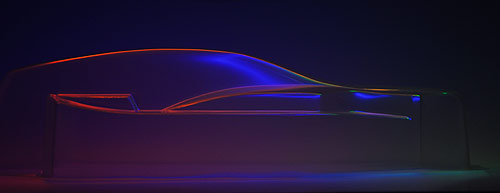
To give me time to paint in the light I wanted, I set the camera at 100iso and F8 - in the pitch blackness I gave it a 3 second exposure time to allow me time to light the shell. |
After pressing the shutter release - I simple moved the phone over the body to illuminate it. I gradually got closer and closer to give slightly more light each time.
The phone can display a rainbow of colours from its LED torch - so by pressing a button it was possible to start with one colour at one side of the shell - moving toward the other side I could switch colours and give a nice effect.

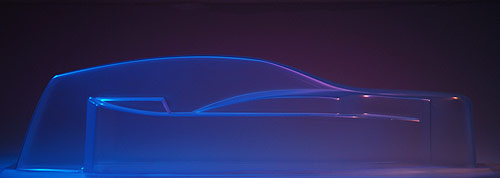
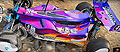
As I got closer, the light started to show up in the actual frame of the photo - as you can see from these multi-coloured shots.
This could be cropped out or photoshoppped out - leaving just the body shell, in all those pretty colours.
I decided this was a pretty cool effect however and so I started to experiment with the light purposely in the shot, to get some cool effects. |
|
 |
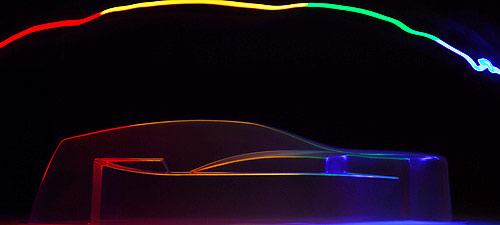
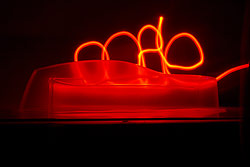
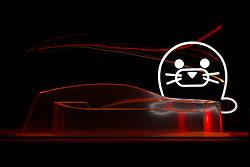
To enable me to get a long enough exposure time to move the light around - I changed the aperture to f20 - this lets in very little light, so a 5 second exposure time doesn't bring in too much ambient lighting.
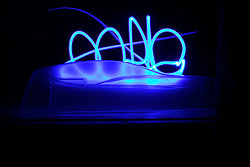
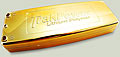
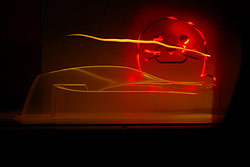
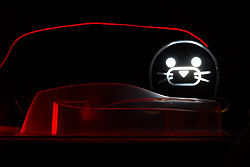
The photo on the left is as simple as it gets - I pressed the shutter release and simply waved the phone around behind the shell - done. This gave us another idea though - spell the word 'oOple' behind the shell to light it up! Oh yes. |
I changed the camera setup to f29 aperture and a 15 second exposure to give me even more time to write the word oOple and then light the shell.
I had to work quickly and precisely to remember the movements and still have enough time to give the shell a dose of 'light painting'. Whilst not an entirely successful exercise - it gave me yet another idea to have a logo behind the shell. |
Since this was a 'Team Azarashi' product photo shoot, I wanted to try and use their mascot - the seal.
 Of course, doing something like the 'oOple' above, would be virtually impossible, so I came up with an idea to create the seal logo another way. Of course, doing something like the 'oOple' above, would be virtually impossible, so I came up with an idea to create the seal logo another way.
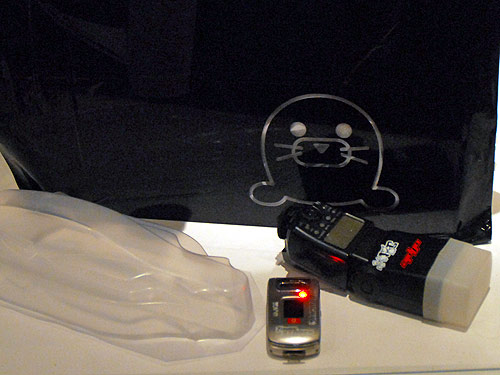
I traced the seal logo in adobe illustrator and cut the shape on my plotter cutter in vinyl. Then I stuck this shape over a large sheet of clear polycarbonate that I had lying around. This gave me a clear area in the shape of the seal where I could shine a light from behind to hopefully create a nice glowing seal.
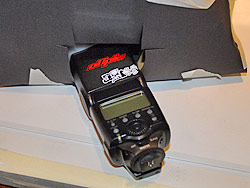
I tried to shine the phone light through from behind - it only took a couple of attempts to realise this was useless. Next I tried my Canon 580EX flash - this was even worse - the white vinyl I had used was far too translucent - and the flash was also spreading out all around behind the scene and illuminating things far too much.
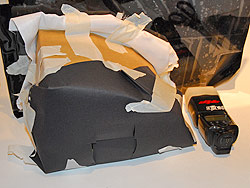
I re-cut the seal in a more opaque black vinyl and made a quick box at the rear to house the flash unit and stop light leaking out and ruining the image |
  |
|
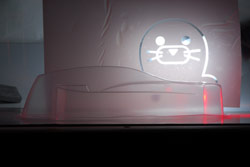
The first images were again disapointing since you could clearly see the flash inside the seal - there was no diffusion and the clear polycarbonate was not spreading the light at all.
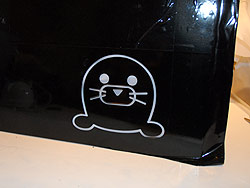
I took the flash shroud off and put some off-cuts of a white materiel I had lying around right behind the seal logo. This has the effect of spreading the light and giving a uniformly-lit seal. |
I was using about 10 flashes, manually triggered from the 580EX, before picking up the phone light to begin illuminating the shell.
I noticed that no matter how hard I tried - there were lines appearing above the image (as seen on the right here). These turned out to be the light reflecting on the shiny black vinyl behind. |
 |
 |
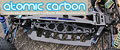
clear seal |
with white diffuser material behind |
|
|
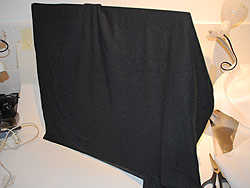
Vicky came up with the idea of using a black Tshirt - draped over the whole background, to absorb any stray light. This totally solved the problem - I would hold the Tshirt up clear of the seal logo for my 10 flashes of the 580EX. Then I would drop the Tshirt down covering the entire background - before finally going to the phone light and painting the light on the shell.
After about ten attempts using this setup - I got an image I was happy with, finally. This entire process took a few hours, all for one photo. Worth it? maybe, but it was fun to try eithe way. |
 |
This is just the way I did it - interesting or not, thats how! There are probably other methods to get similar results, but I am happy with the outcome.
It was a learning experience and something I'll definitely be expanding upon in future.  |
The final image:
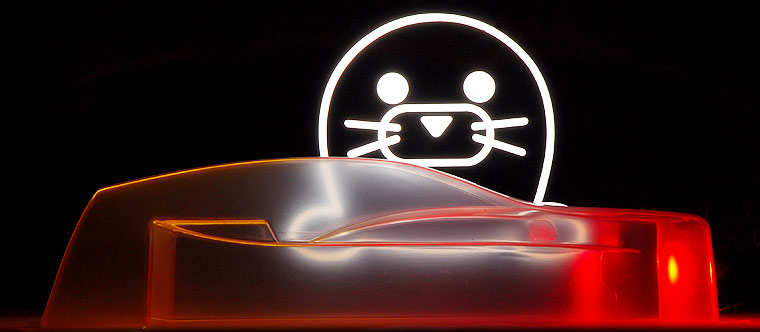
Final image settings: f29, iso100, 13 seconds, 70mm
|