 |

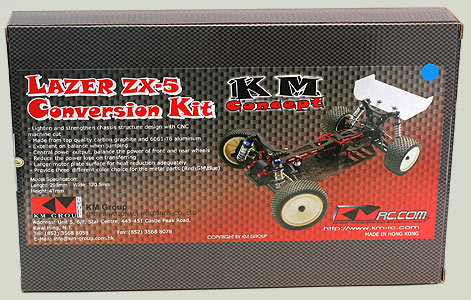
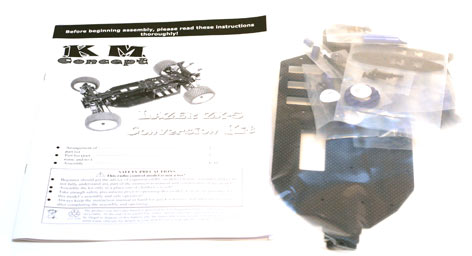
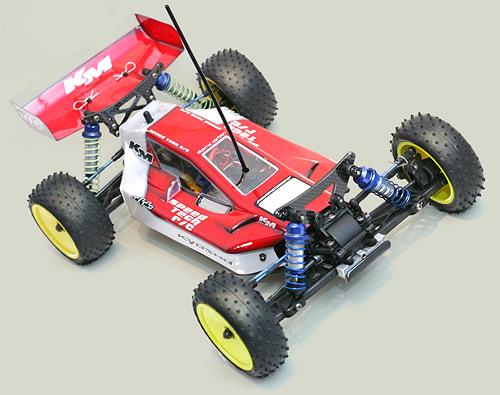
KM Concepts conversion for the Kyosho Lazer ZX-5 is the product that introduced KM Concepts to many peoples eyes. A new company, established in early 2005, KM Concepts is a bfrand of the ‘KM Group Holdings Co. Ltd.
KM are based in china and have some of that countrys top drivers on hand in the R&D department, to oversee the design and implementation. As well as the conversion for the ZX-5, KM have recently been working on various other conversions for the likes of the Tamiya Impact and Kyosho mini Inferno.

Speedtech RC are the company importing KM into the USA and thus making this new brand available world wide.
|
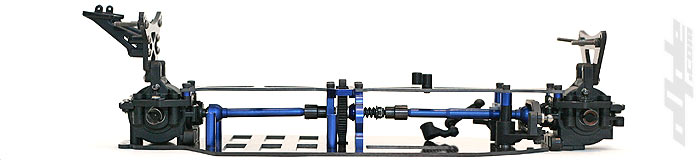
The KMC conversion is designed to redistribute the weight of the main components, motor and cells, for optimum balance and traction. 
The cells move to a new saddle pack arrangement and the motor moves to the centre of the car - connected to a new centre bulkhead.
All very neat sounding stuff. The box for the conversion is quite small and very thin since this kit only contains chassis components, no new larger parts like bodyshells or wings. Nor are there any new moulded parts in the conversion. |
|
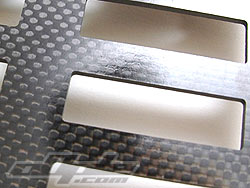
Upon emptying the contents from the slim box, you are presented with an arrangement of numbered bags containing parts for the various stages in the built. A glut of carbon fibre and blue anodised alloy is evident in the clear bags which all looks to be of high quality. The alloy parts are also available in silver and red, so choose your kit to suit your tastes. The blue in this kit matches the existing Kyosho parts which is nice. |

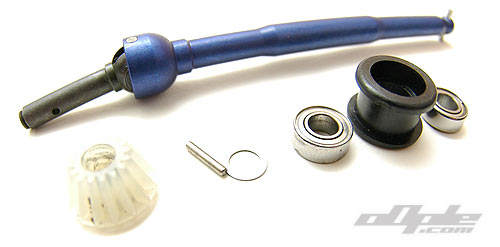 |
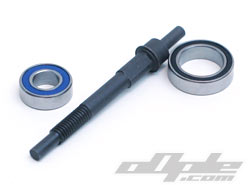
The input shafts from the CVD's need the pinion and bearings adding. Unlike the original car there are now two bearings on the rear input shaft (one is provided in the KM conversion for this).
These build identical front and rear. The manual makes no mention of shims which are used on the original car. I found the rear had excessive play without any shim, so I added one from the ZX5. The front however bound up when a shim was installed so I left this as per KM instructions. |
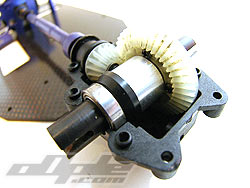
The next part of the build is the centre slipper assembly. The centre mounted slipper uses the parts from the original ZX5 and places them on a new longer shaft with drive cups at either end giving drive to front and rear ends.
This is one area the kit falls down a little since it requires two drive cups when only one is used on the original ZX5. KM don’t provide one of their own making so  instead you are left to purchase another, its not an excessively expensive part butlike a lot of kyosho parts it comes with other things you do not need. The partnumber for this is LA203 – R.Main drive shaft. instead you are left to purchase another, its not an excessively expensive part butlike a lot of kyosho parts it comes with other things you do not need. The partnumber for this is LA203 – R.Main drive shaft. |
 |
Another thing to be aware of was that I noticed in this part from kyosho there was no grub screw for the drive cup. Perhaps this is just a one-off, but it’s something to look out for, luckily I was able to source an appropriate grub screw from an old pinion I had lying about. |
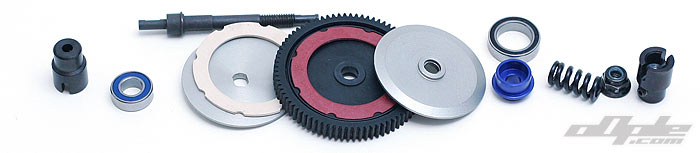
The slipper goes together easily on the new shaft |
 |
 |
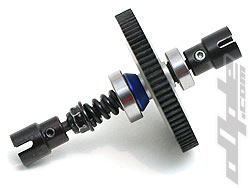 |
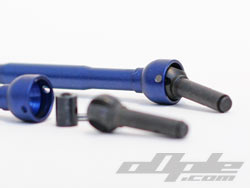
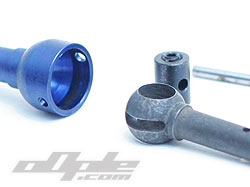
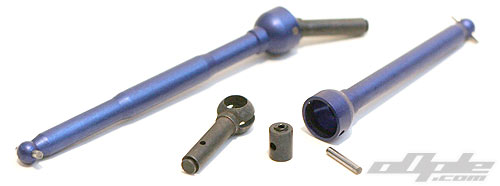
| Two drive cups are needed in the conversion |
New slipper shaft and bearings |
Assembled slipper |
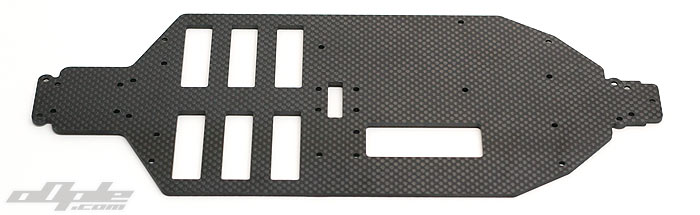
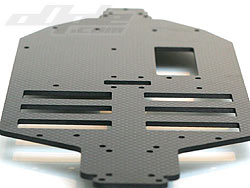
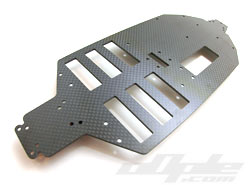
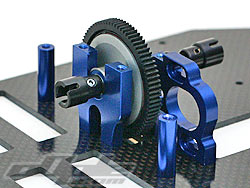
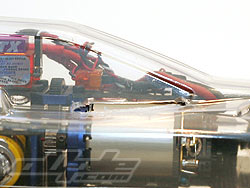
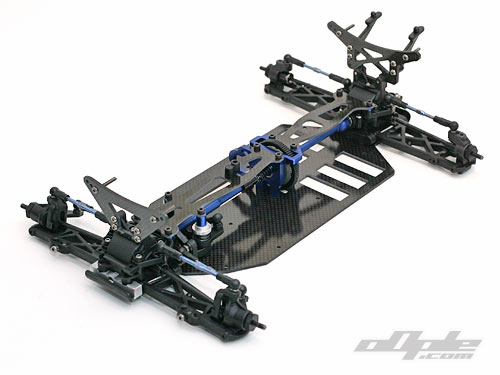
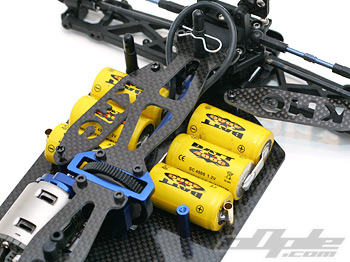
Now its time to take a look at the chassis. This is cut from 2.5mm Carbon fibre and looks very nice indeed. 6 cell slotsatthe rear locate the cells in a 3+3 saddle pack either side of the rear centre shaft. This is the key to the KM conversion, the better distribution of weight.
The cells sit directly in the slots – rather than the increasingly popular plastic trays seen on other similar cars. The edgesof the carbon fibre are quite sharp so its probably worthwhile slightly bevelling the slots (from above) with a file. |

|
This also lowers the cells very slightly which isn’t a bad thing since they sit 1mm or so above the bottom of the slot. If you do this you might have to put some foam under the cell straps to stop the cells moving. Some people also go to the effort of sanding all the edges of the chassis to make handling the car easier and / or running a bead of CA glue along the edge to help prevent delamination of the carbon fibre. This is personal preference and not necessary. |
 |
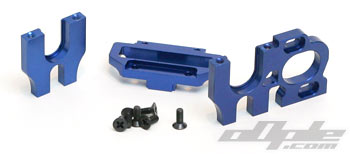 |
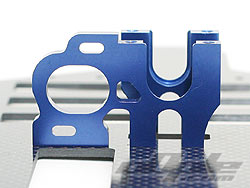
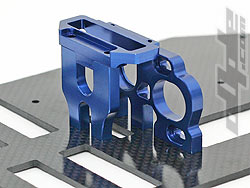
The centre bulkhead comes in three parts, with two vertical plates holding the bearings for the slipper assembly – topped off with a centre bulkhead cover, which clamps the assembly together.
The front part of the centre bulkhead doubles as the motor mount. Sadly the neat o-ring captured motor screws on the original ZX5 are not retained here, not a big deal but I liked them. |
At this point I should mention that there is really no instructions on building your ZX5 back together. The KM ZX5 conversion manual is just that, it tells you about the conversion but the rest you have to look back to the original ZX5 manual. The KM manual does not even contain an illustration of any of the ZX5 build nor mention what order to do things in.
This isn’t a major problem, but it would be easier to reference just the one manual. There is a slight sense of being abandoned at points in the build to figure your own way though the process.
Up to stage 9 in the build you can just concentrate on the KM manual because no other ZX5 build is needed. Stage 11 however begins with installing the top-decks on to invisible gearbox tops!. Ok, ok, step back – lets rethink this.
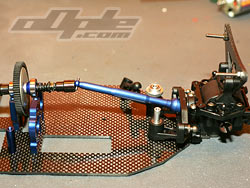
Before going past stage 9 in the KM build its best to start off with the inner front and rear pivot blocks, the ones sitting closest to the centre of the car. These sit under the drive shafts and steering assembly, so its easier to install them now.
With the slipper loosely installed I turned my attention to the front and rear gearboxes.
With the KM CVD inputs installed I screwed down the front and rear gearbox lower halves to the main chassis, threading the front shaft though the steering and locating both shafts into the centre drive cups. With front and rear diffs dropped in, the whole assembly has a precise quality feel about it, with no slop or wobbles. Nice.
The KM manual says to reverse the steering assembly by simply swapping the bell cranks from left to right and vice versa. This is to take account of the new servo position on the left.
With the steering assembled on the original ZX5 steering posts, the entire unit can be slid over the front centre shaft (by lifting up the slipper unit to free the front shaft), and secured to the chassis. |
|
 |
 |
 |
Front centre shaft with one-way diff |
With steering installed |
Completed centre drive line |
 |
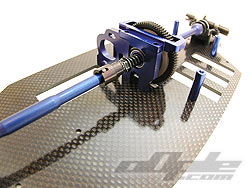
Twin top decks finish off the KM chassis conversion reaching from the front gearbox to the centre bulkhead, and back again to the rear gearbox.
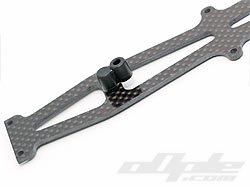
Alloy spacers are provided for the steering assembly and more anodised pacers go between both top decks and their respective gearbox mountings at either end of the car.
The front top deck needs the aerial mount from the original zx5 mounting prior to installing. |
With both top decks screwed down with the provided screws, there was slight binding of the slipper in the centre bulkhead, so I backed off all 4 screws about ¼ turn and everything was fine.
The steering didn’t bind even with the screws clamped down tight – something I found happened on the original ZX5. |
 |
 |
Ariel mount installed on the top deck |
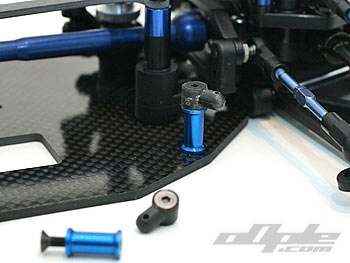
Front top deck spacers (blue parts) |
|
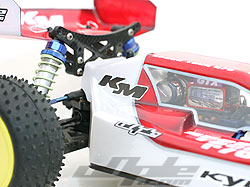
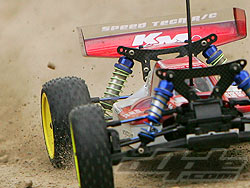
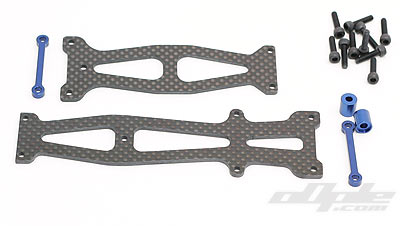
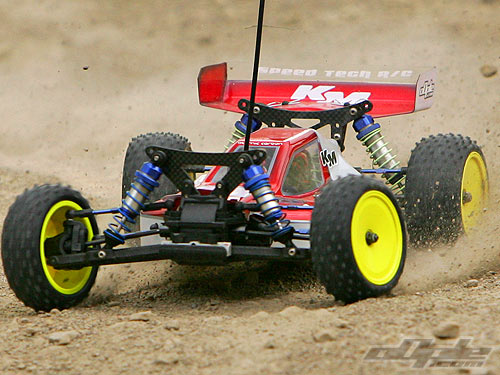
| The completed chassis is nice and stiff and looks truly fantastic. It cleans up the look of the car and you can see the pivot blocks / change settings easier than on the original ZX5. For instance you can see the amount of antisquat spacers on the rear and readily change the setting. |
Shock towers are from Atomic Carbon and not part of the conversion.
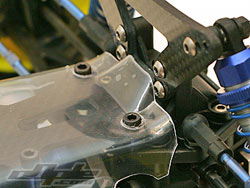
A shell isn't included in the conversion so the original shell from the ZX5 is used. The new motor position won't let the shell sit low enough so a long hole needs cutting to allow the motor to 'poke through' slightly. This is easiest when the car is ready to go with motor and wiring installed and when using a new (clear unpainted) shell.
To do this, I used my reamer to make two large holes at either end of the slot I wanted to make. I joined the holes with a scalpel, scoring along the shell.

The front top deck sits higher than on the original car, also large socket head screws are used here so the front of the shell won't sit low enough. This is easy to fix by reaming out where the screws are so the shell sits around them. (see photo on the right)
|
|
Mounting the shell on the KMC conversion is – interesting. KM seem to have thrown this one in at the last minute, providing spacers (shown in an additional leaflet) to mount the front body posts from the zx5, but this requires screws and nuts that are suggested by, but not supplied by, KM. Nor are there any usable ones in the existing ZX5 screw set.
This left me in a bit of a pickle since I had no screws that were appropriate to use - two 25mm long 3mm counter sunk. I couldn’t even find some I could readily borrow from another car. |
|
There are a few ways of mounting the rear of the shell, the manual suggests using a body post which is not included, attached to the rear top deck. The plastic cell posts from the original ZX5 (no longer used with this conversion) are almost a perfect fit for this purpose. I say "almost" since when mounted to the top deck there aren't holes low enough to secure the shell.
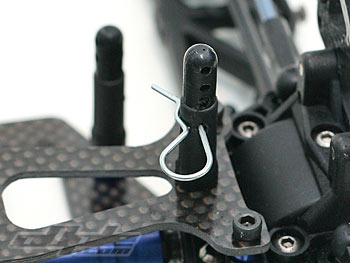
I drilled two small diameter holes in one of the posts, the lower being for a body clip for the shell to rest on, and the upper for a body clip to hold the shell in place. |
To mount the body posts I manged to find some blue alloy spacers (by Yokomo) in my pitbox – These are threaded all the way through so secure to the chassis with a short counter sunk screw (from the original ZX5) and then the small ZX5 body post (with square lug cut off so it sits flush) is attached from above with another 6mm counter sunk screw.
The Yokomo spacers were a little long for the job but still work fine - I just put the body mount holes a little higher.
Most people wont have these spacers but a better fit would be to cut one of the long chassis brace tubes from the original ZX5 in half, using one half on either side. It means you cant easily go back to the ZX5 chassis but hopefully you wouldn’t want to.
|
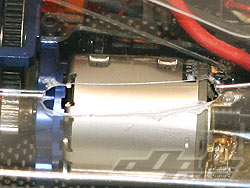
The electrics install without too much fuss, although space is limited. The cells now sit in a saddle pack at the rear of the car. For this, a long link wire is needed to reach over the rear top deck.
The ESC, receiver and servo can all sit on the left side of the car. Balancing things out on the right side of the chassis is the motor. I did find my Novak ESC to be tricky to fit in a neat way, the large capacitor being the main problem. I settled on mounting the ESC on the rear top deck. I also used the rear top deck to mount the transponder.
The KO 2144 servo I used was VERY close to touching the front centre shaft. The bulge in the shaft makes this a close fit. Shaving off a fraction of the top corner of the servo tab could be in order for some servos, others may find their servos to have no issues at all. I left the servo as-i. |
 |
The motor access is not really mentioned in the manual. Because of the central location and battery placement, the motor is quite hidden away. Unlike the similar layouts I did find changing pinions on the car fairly easy, but installing the motor is tricky without the correct tools. The main problem lays with the battery strap post location, which is directly in front of the motor screws. |
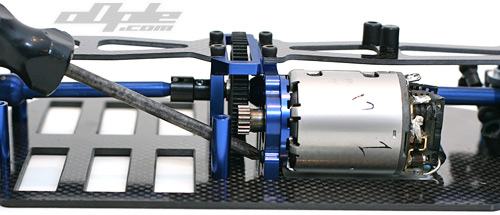 |
Phillips head screws are provided for the motor install, but I found these to be very hard to use in practice. Because of the tight space, the screw driver needs to be used at angles which I didn’t find possible.
I switched the screws to some 3mm cap heads and used a 2.5mm ball-ended hex driver to install them. This really makes life a lot easier. Not only on this car, but other similar layouts where motor access is limited. |

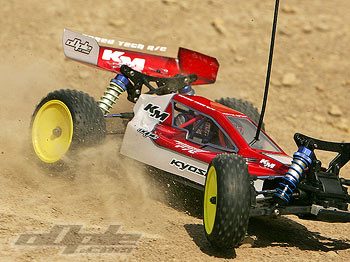
Testing the car
The first time out with the KMC converted ZX-5 was to be at Oswestry National, sadly poor preparation (hinge pin screw missing) messed my first practice up. With the car finally on the track and running, it was now the rear diff which was slipping excessively - me and my deadlines, bah. The diff really needed a rebuild with new balls but for now I just tightened things up - not the perfect solution but it got me the first real taste of the KM converted car. I retired the car after a couple of runs because of the rear diff which was disappointing.
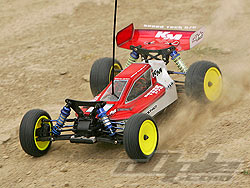
For more of a taste I took the car to my local off road track, Batley Buggy Club. The handling is unsurprisingly very good - given the already great handling of the ZX5, the KM conversion has a good suspension layout to build upon with a better balanced and much stiffer chassis. The setup I was running was the same as I ran on the ZX5 and seemed to be a good start for me at least. |
 |
 |
The car seemed calmer and more planted than before the conversion. The car went over the rougher parts of the track without being thrown around, soaking up the bumps better. This was particularly noticeable at the rear.
Jumping, again felt a little better, it was hard to compare the two but I’d say the car jumped flatter than before. |
Whilst there is nothing in the KM ZX5 conversion build that would excessively tax the experienced modeler or racer, I think its fair to say that some steps could be better. The manual is OK but I couldn't really be kinder than that. It could do with some more explanation in some steps where the novice might be left scratching their head, a bit of common sense is all that's required. Parts quality, particularly the carbon fibre, is great and all seems well up to the job.
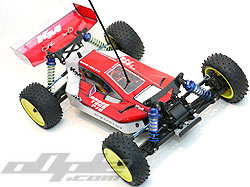
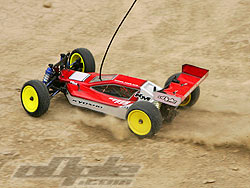
The conversion builds into a very robust looking and feeling car - the ZX5 parts are the only parts you'd ever need to worry about.
The completed chassis really does look the business and the improved handling can’t be sniffed at.
The ZX-5 is a great car, despite some weak points which kyosho have been slow to address. |
 |
| It would not surprise me at all if Kyosho are kicking themselves for not doing something similar to the KMC conversion themselves. KM Concept have created a worthy upgrade and considering it is their 'intro' product, its a job well done. |

|