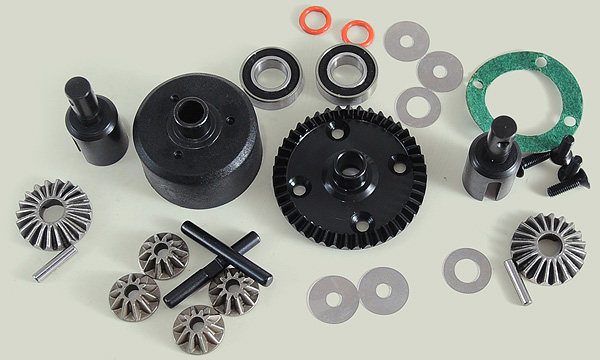
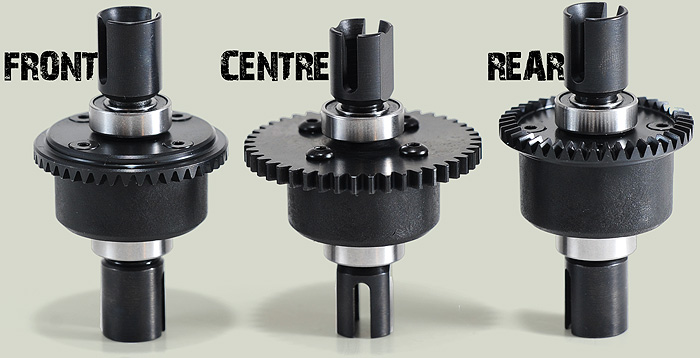
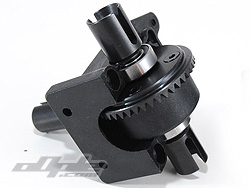
Rear diff parts - all the three diffs are the same assembly inside.
The differentials are all oil-filled geared, as are the norm on 1/8th buggies. The three differentials all come bagged sperately. Front and rear diffs have slightly different builds - with the rear having an outside-facing ring gear teeth to offset the transmission line and allow a more central engine layout.
Building the front diff first I found it hard to insert the outdrive into the metal insert on the differential casing side of the diff. It felt tight toward the outside of the hole and whilst I could get the outdrive in, it was very tight. I couldn’t see any left-overs from the manufacturing process so spent a few minutes with some super-fine Tamiya abrasive paper to take the black colour off the inside of the diff insert. The other identical diff casings from the centre and rear diffs were all fine - and talking to JQ there hasn’t been any other reports so it seems to be a one-off issue.
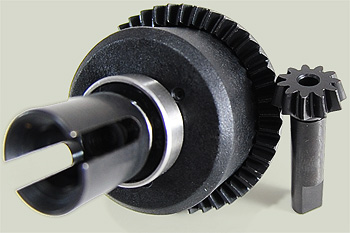
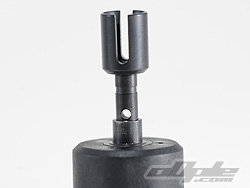
Above - front differential and gearbox input shaft - teeth have a slight helical cut.
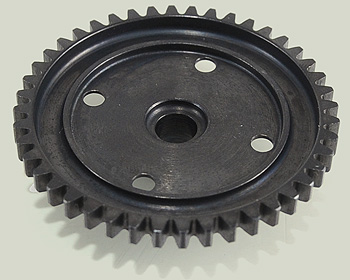
The spur gear (above) on the centre diff has lots of material removed.
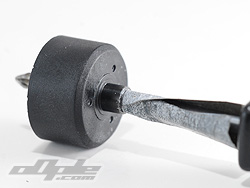
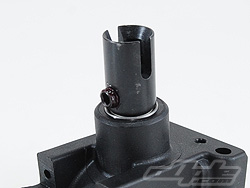
One of the three moulded diff halves metal outputs was tight on the outdrives.
I used some fine tamiya sand paper around a screwdriver to free things up
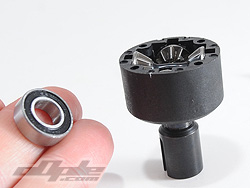
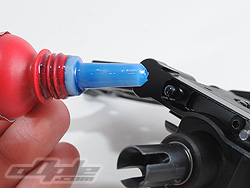
Diff filled with oil - then I realise I forgot to put the bearing on...... :(
The centre and rear diffs are build in the same manner as the front diff - in fact, other than the drive cups on the centre diff, and the steel ring / spur gear, all the diffs are identical in construction.
As for the dampers previously, there's no diff oil of any weight included in the kit but since these are dependant on track / setup and most racers will already have a range of oils. I went with a pretty hard 10k/15k/7k setup - but I like it HARD.
With the diffs all built it’s time to start assembling the front end of the car - which all hangs off the front gearbox. The gearbox itself is a really well designed bit of kit with plenty of lugs and interlocking going on between the two halves to make things nice and sealed from the elements to stop unwanted penetration.
Three different-offset plastic inserts are provided for the suspension braces. And these can be run upside down for five total setting options (the zero-offset one is the same either way round)
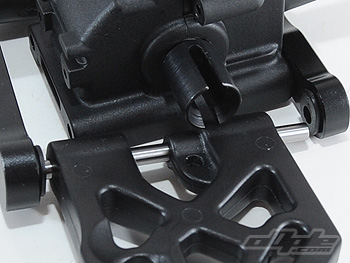
The bottom of the gearbox is open to allow the differential to sit as low as possible into a recess in the chassis.
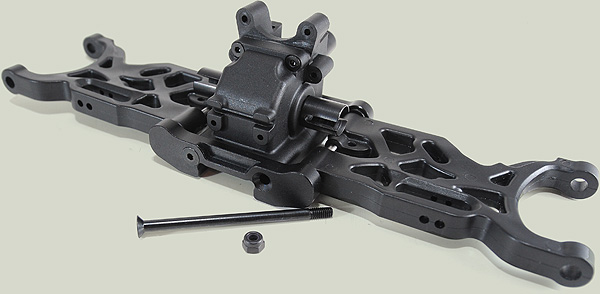
with the input shaft and differential inserted, the front gearbox clamps together with a couple of 3mm countersunk screws at the top and two huge 4mm bolts which run from front to back - securing the alloy hinge pin mounts to the gearbox at either end.
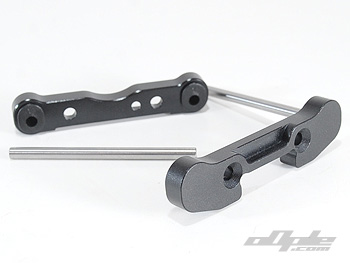
The hinge pins themselves are beefy looking ground steel and sit inside plastic bushings - which come in three off-sets to allow suspension angle / kickup changes. I went with the suggestions in the manual, with a ‘zero’ degree in the front mount and 1 degree in the rear mounts, which will add 1 degree to the front kick.
Front and rear pin braces and ground-steel hinge pins
The plastic blocks set the desired angle for the pins - in addition to the chassis kick up of course.
Diff inserted into the front gearbox
JQ advises threadlocking the screws and nuts that secure the suspension holders to the gearbox and clamp it all together.
Make sure this grub screw is well threadlocked - or bad stuff occurs.
The suspension arms front and rear are moulded from reasonably flexible plastic which looks like it’ll never break, just spring back - but I’ll give it my best shot.
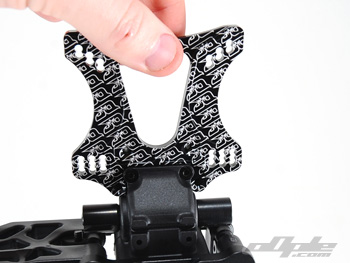
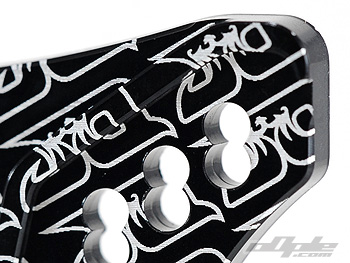
The shock towers supplied in theCAR limited-edition kit are about as ‘pimp’ as it gets - JQ has pulled out all the stops and laser etched the company logo like a maniac all over the towers front and back - it’s like they’ve fallen into logo-stew. It’s actually hard to see the details of the towers with all the logos punching you in the eyes but there’s some nice intricate machining and radiused edges to lessen the weight and give them a nice finish. The regular car gets the same towers but without the visual insanity of these.
Screwing the shock tower to the front gearbox is pretty hard work - I did think the screws weren’t up to much but on closer inspection it looks like my 2mm driver is in need of a replacement.
Either way the plastic is hard and the screws take some force to insert fully - after doing a couple I greased the holes lightly to aid insertion (oooerr).
The front tower slips over the gearbox - you can lift it up before the tower is even screwed down!
It's hard to see the details on the limited edition towers


 With the diffs all built it’s time to start assembling the front end of the car - which all hangs off the front gearbox. The gearbox itself is a really well designed bit of kit with plenty of lugs and interlocking going on between the two halves to make things nice and sealed from the elements to stop unwanted penetration.
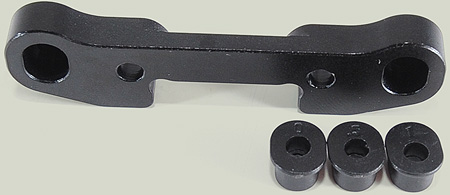

 The suspension arms front and rear are moulded from reasonably flexible plastic which looks like it’ll never break, just spring back - but I’ll give it my best shot.
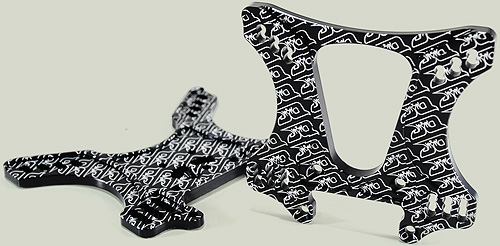 Screwing the shock tower to the front gearbox is pretty hard work - I did think the screws weren’t up to much but on closer inspection it looks like my 2mm driver is in need of a replacement.
  insert fully - after doing a couple I greased the holes lightly to aid insertion (oooerr).