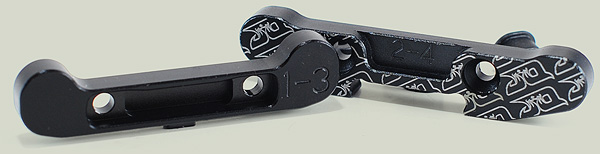
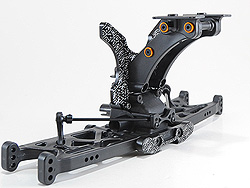
 The rear suspension again uses a couple of beefy alloy inner hinge pin braces. The rear suspension again uses a couple of beefy alloy inner hinge pin braces.
The rear-rear brace sets the toe-in angle of the JQ car and is stamped with 2-4 - which roughly gives the user a 0.5 degree increment change from 2-degrees toe-in to 4-degrees by using the three different inserts provided. |
The front brace on the rear end alters anti-squat angles and again by using the three different inserts the user can change from 1 degree of anti-squat to three degrees.
I used the kit suggestions of 2 degrees anti-squat and 3 degrees toe-in. |
| |
 |
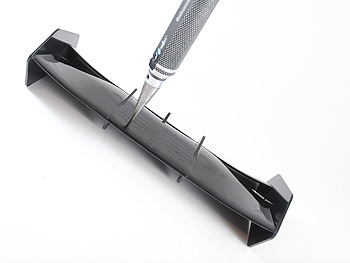 |
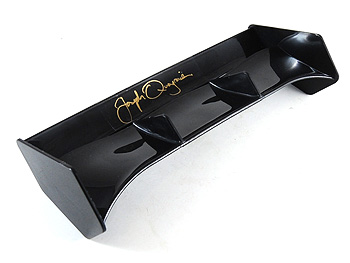
| The wing |
Some drilling is required - but it's marked up well |
|
 |
 |
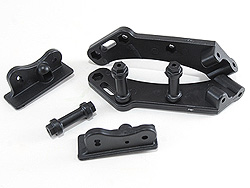
| Some random plastic bits...... |
Turn into the wing mount! AMAZING |
|
The chunky moulded wing mount has a couple of adjustments for angle and bolts to the shock tower. The wing supplied in the kit is a nice design - but doesn't come pre-drilled which is a bit mean.The holes are properly marked up though - I used a reamer to slowly open up the holes a little at a time until they just fit over the lugs on the wing mount.
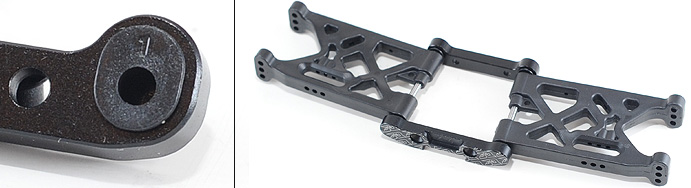
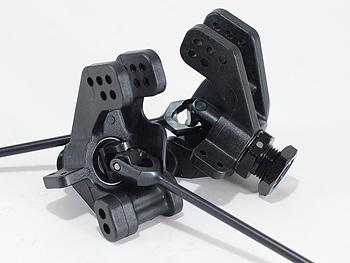
The rear UJ driveshafts are almost identical to those on the front but are slightly longer. These push into the chunky plastic hubs which have 5 mounting points for the camber link.
The hubs pivot on long steel pins which are retained with a nyloc nut. A couple of plastic spacers are provided to adjust the wheelbase but the pin needs to be removed to make adjustments - rather than using clip-on spacers. But if it's not an adjustment you'll be changing a lot then it's not a problem at all.
 |
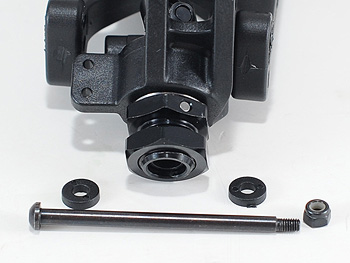 |
| The rear hubs have plenty of adjustment and are chunky |
The wheelbase can be adjusted by placing the spacers to shift the rear hub fore & aft. |
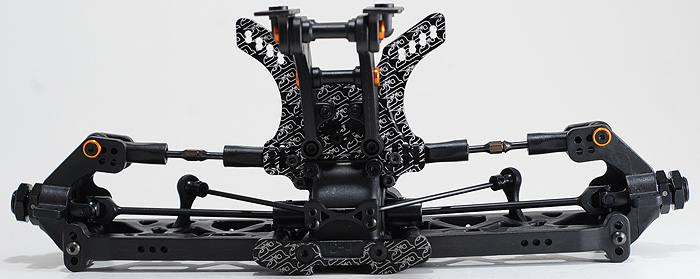 |
Completed rear end |
The suspension all attached, the dampers can be installed. Front and rear ends both have a 'backwards' screw used - the front right-hand, and rear left-hand (from the imagined-drivers point of view!) These backward screws basically tighten themselves under heavy loads - as the suspension arm arcs round the damper could otherwise put anti-clockwise pressure on the screw and loosen it - apparently!

The front and rear ends completed - those orange dashes of colour really look damn fine.
|