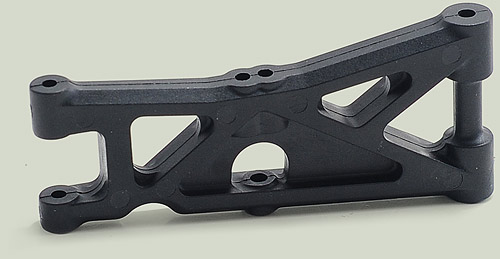
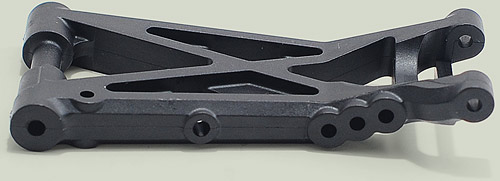
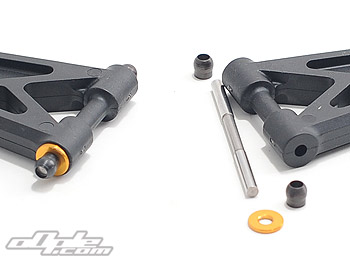
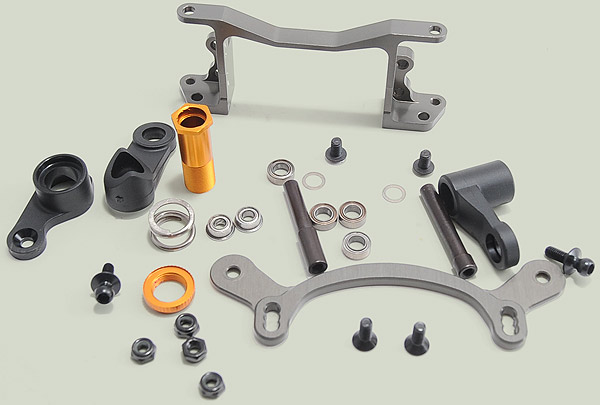
Above: Front suspension arm - Below: rear suspension arm
With the chassis to one side - it's time to start on the front and rear suspension. All the inner hinge pins are capped off with steel balls, which in turn pivot inside alloy suspension mounts all round, effectively capturing all the hingepins.
The arms certainly tick all the right boxes and look very strong. They aren't the lightest - quite a bit heavier than the Tamiya carbon arms we tested them against, but equally beefy looking.
Geometry wise it's no surprise that the lengths are identical to the Tamiya - and the Associated B4, as well as several other cars since these were some of the arms used on the prototype Durangos.
The rear arm has a distinct angle - more pronounced than most cars. This places the inner shock mounting holes lower down, which minimises the height change when moving the shocks inward/outward as it more closely follows the arc of the shocks.
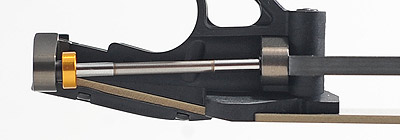
The hinge pins on the DEX410 are all ground down to a smaller diameter in the centre - on the outer hinge pins these are used to capture the pins with a grub screw, but on the inner pins it seems to be purely for weight saving / friction. The front arms mount up easily enough - the alloy front brace is screwed to the leading edge of the chassis to securely mount the front arms. Initially there was a lot of friction and I couldn't understand why - but rather embarassingly I used the 1mm orange washers rather than the 0.5mm, how we laughed. With the correct washers installed the front arms were solidly mounted and very smooth indeed.
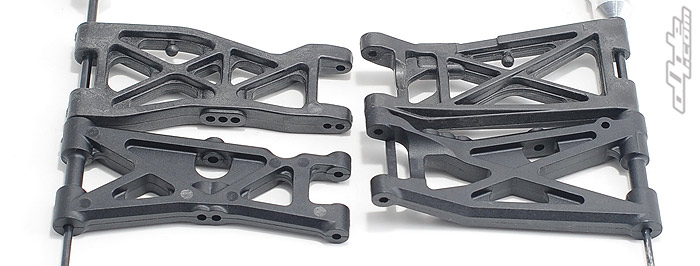
Tamiya arms (top) VS Durango arms (bottom). The lengths are the same - the Durango arms use more material and are consequently a tad heavier.
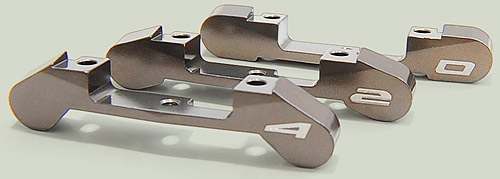
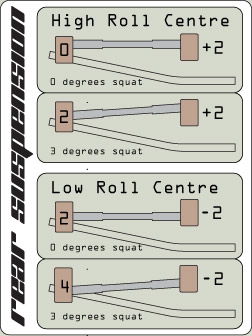
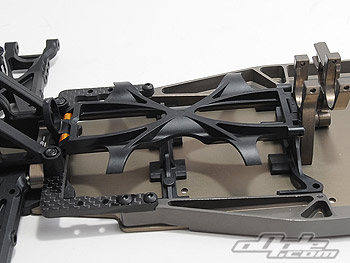
The rear suspension mounts in much the same way as the front but several tuning options are available and included in the kit. The forward suspension mount at the rear of the car which was installed through the rear bulkhead earlier in the build can be used in combination with three different alloy mounts for the rear of the car, which gives '0' or '3' degrees of anti-squat, and / or a higher or lower roll-centre. Yeah, I know it's hard to explain, but trust me, it's a neat touch by Team Durango to include all the options in the kit. I decided to go with a setup the UK Team had tried the weekend prior, with the low roll-centre and 3 degrees of anti-squat (the '4' brace) at the back.
Now, unlike the front suspension, I did actually assemble the rear correctly first time - but with the rear mount screwed down there was just a bit too much friction in the movement and I wasn't happy to leave it like that.
The rear suspension features droop screws which sit on a nice wide plastic base - these make droop adjustments super easy.
I tried a few things, even completely removing the 1mm washer that's supposed to be on the hinge pin - but without it there was just too much slop. Without wanting to spent too much time on this step I ended up replacing the 1mm washer with some Tamiya shims, 2x0.3mm and 1x0.2mm for a grand total of 0.8mm - this was perfect and I left it like this. I can't see the suspension really wearing that much - so I'm not sure how long it'd take to free things up if it was left. We talked to Adam Skelding of Team Durango UK and mentioned the problem - apparently some kits are OK (manufacturing tolerences) but in the second batch of kits the spacer is already going to be replaced with a 0.8 spacer like we used instead of the 1mm. Adam did mention he'd lightly sanded down his 3mm washers (which are installed at the rear) to free things up on his personal car.
Front arms - YES those ARE the wrong spacers! :)
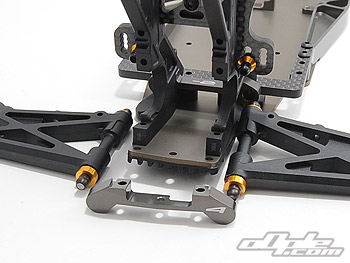
Rear suspension mounting.
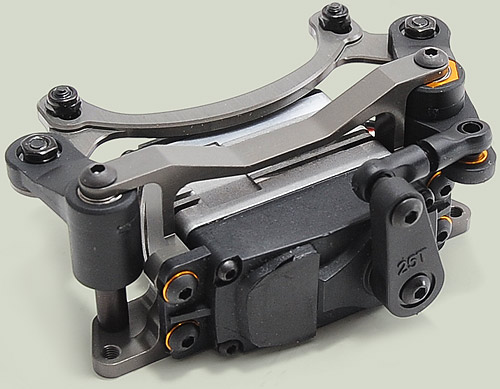
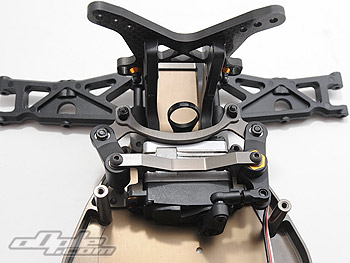
Steering on the DEX410 comes via a traditional dual vertical bell-crank setup, but with such a narrow design as the 'Durango' the steering has some unique features. The servo actually sits directly under the steering and between the bell cranks.
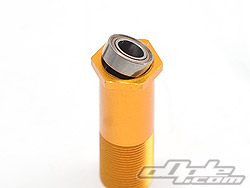
Everything attaches to an alloy 'bridge' which sits around the servo, the entire unit is dropped into the car in one. Assembly is fairly straight forward but I did have a problem installing the bearing that sits at the top of the servo saver crank - it just wouldn't push in.
Bearing was too tight here
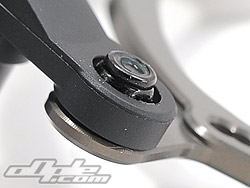
With the nut not even fully tight - you can't grip it with a normal driver.
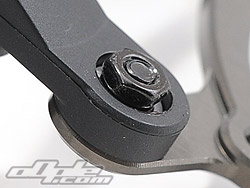
- nuts upside down! :)
Eventually I decided to warm the servo saver tube and freeze the bearing, in the hope that it'd go together easier. It worked but the bearing didn't feel so great afterwards and I have to wonder if I did the right thing. We asked Durango about this and it seems a manufacturing problem that's not appeared in any other kits - I was handed a brand new post and bearing which I'll fit at a later date - needless to say they were perfect.
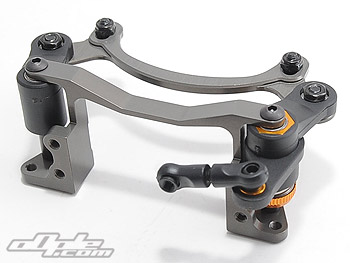
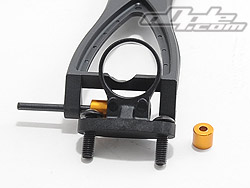
The alloy steering link between the two cranks rides on ball bearings which is nice - screws and 3mm nyloc nuts attach the link to the cranks but I found the nuts impossible to tighten with the tools I had since the nuts sit too low. As a quick fix I simply turned the nuts upside down so the nylon went on first - it cured the problem so it's all good.
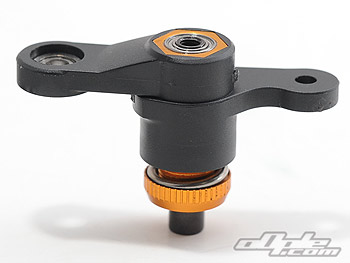
Completed servo saver
Ready to install the steering servo.
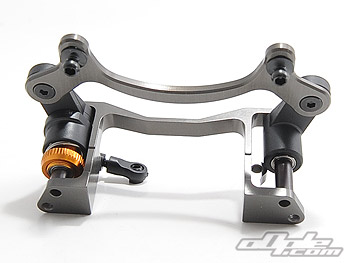
Steering installed
The prototype 'Durango' cars of old always ran with NiMh cells but with the recent mass-adoption of LiPo technology the DEX410 has been designed for both types of cell - and the implementation is better than most. Whichever battery type you choose to run the layout uses saddle-pack style.
Moulded battery holders and straps are supplied in the kit for both types of battery, so no modifying parts or buying extras, very nice. Most people I suspect will want to run LiPo, and this is the one we'll go with. The lighter weight at the back end VS the heavier NiMh cells will change the balance slightly, but if desired Team Durango do supply some brass weights to add some weight to the back end - which might be especially useful if you use some of the lower capacity lightweight LiPo's.